
How I Turned a 10×20 Shed Into My Dream She Shed
You can shop the items I used in my she shed HERE from Amazon
Items used for walls and ceiling you can find HERE
As an Amazon Associate, I may earn a small commission from qualifying purchases at no additional cost to you.
From an empty shell to a cozy, air-conditioned workspace, guest room, and little escape of my own
When I started this project, I had a 10×20 shed and a vision.
That was pretty much it.
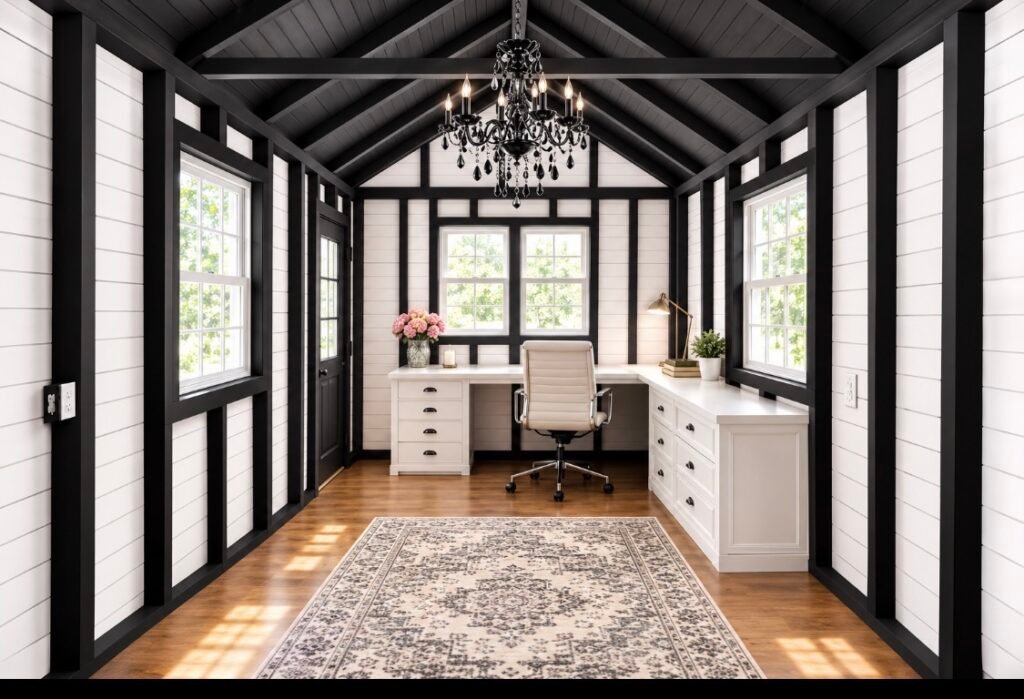
I knew exactly what I wanted my finished she shed to feel like: bright white walls, dramatic black exposed beams, a comfortable place to work, somewhere to relax, and enough functionality that the space could even double as a private guest room.
What I did not know was that my original plan was going to change almost immediately.
And that became one of the biggest lessons of this entire project:
Sometimes DIY means figuring it out as you go.
Step 1: Starting With My Blank Canvas
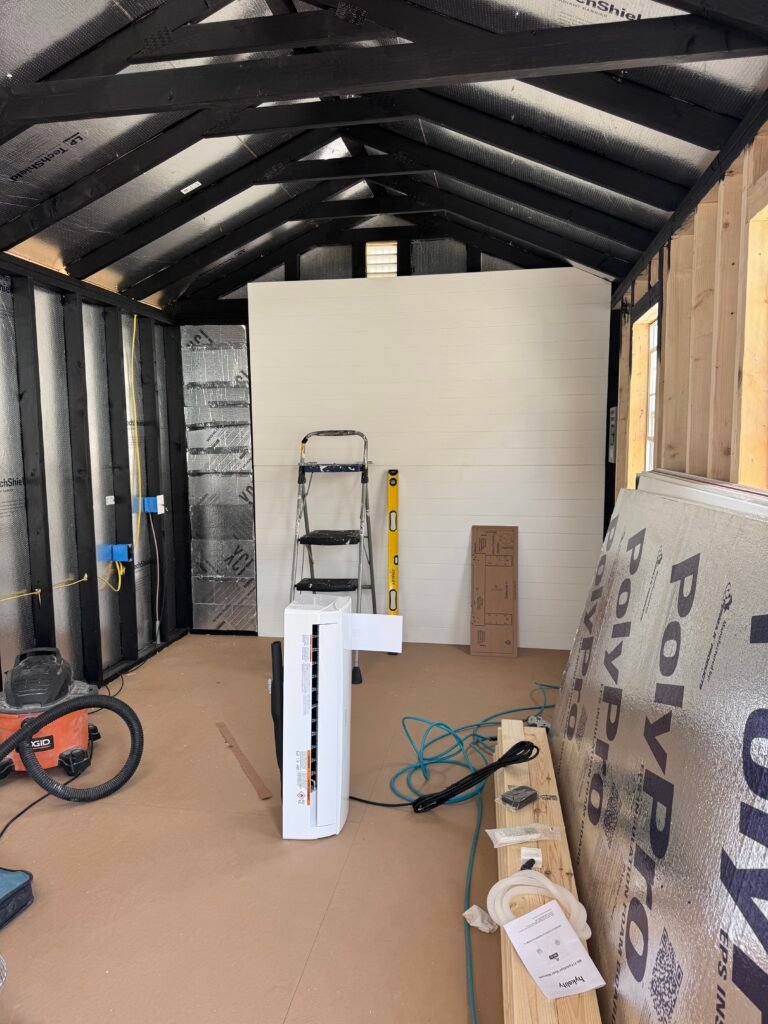
This is where it all started.
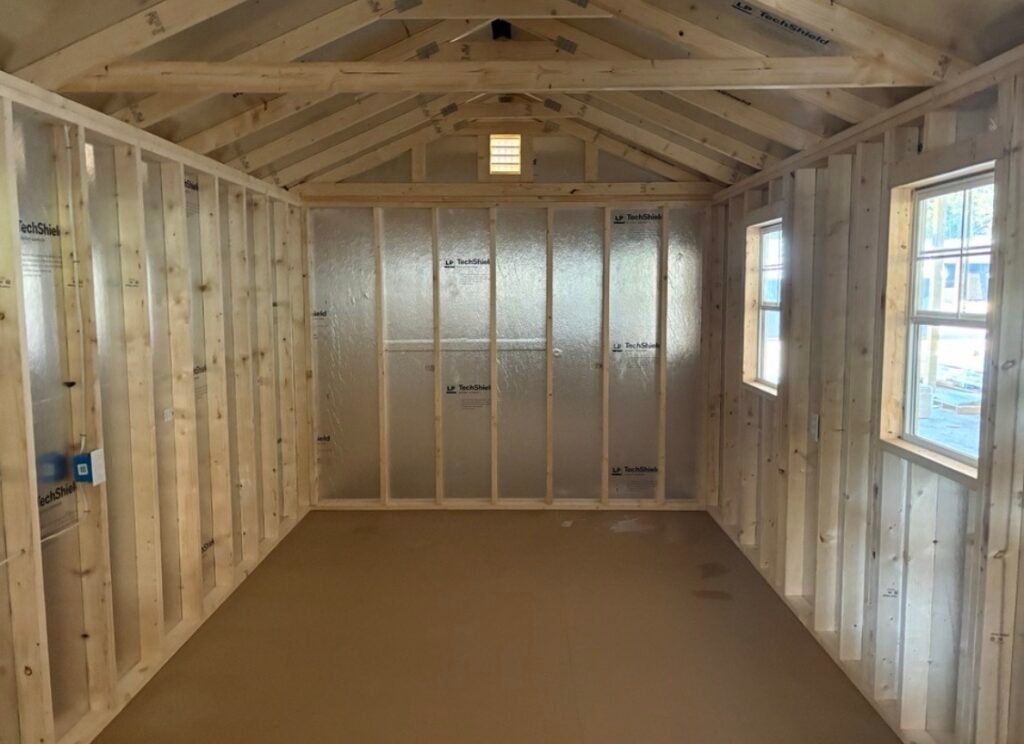
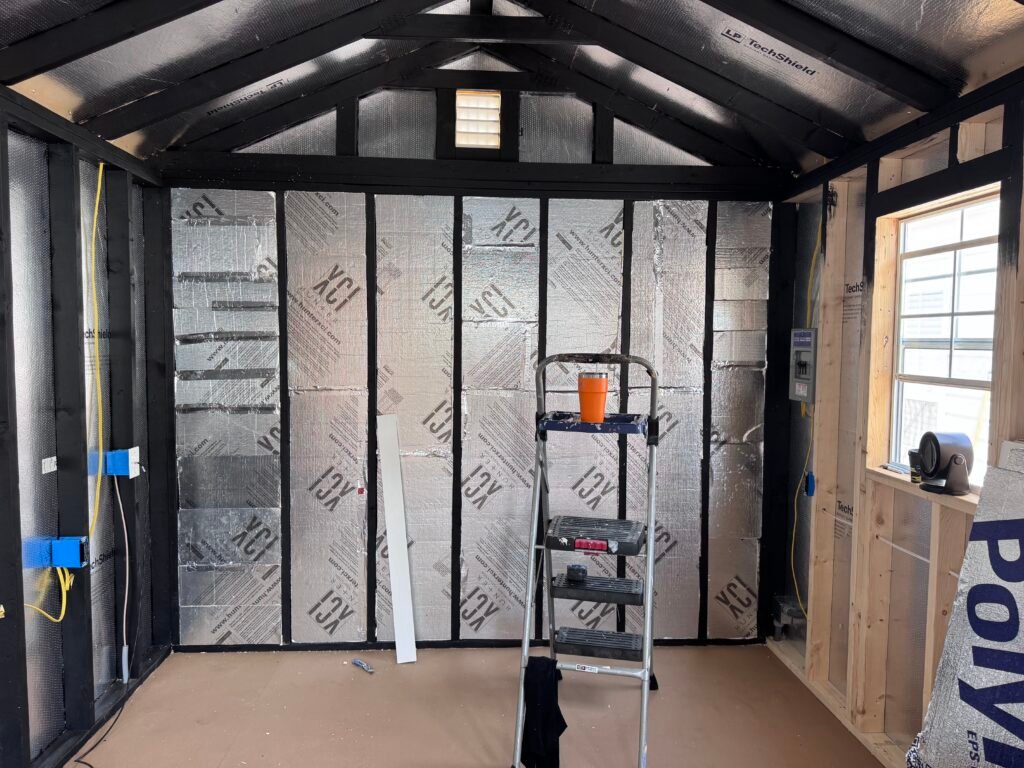
A completely unfinished 10×20 shed with exposed studs, rafters, windows, electrical outlets and a whole lot of potential.
I could already picture what I wanted.
My original plan was to leave all of the wall studs and ceiling beams exposed and paint them black. Then I planned to cut 4×8 shiplap panels to fit between the studs.
In my head, it was going to have a beautiful modern farmhouse look with white shiplap and contrasting black beams.
There was only one problem.
I misunderstood what was already installed behind those studs.

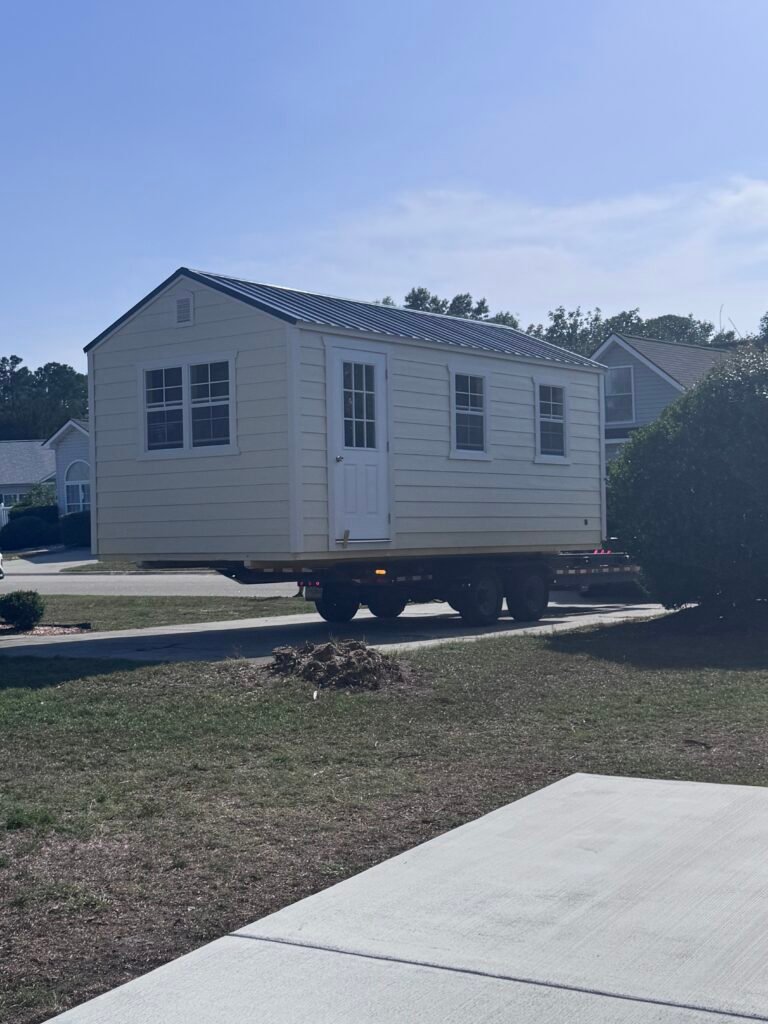
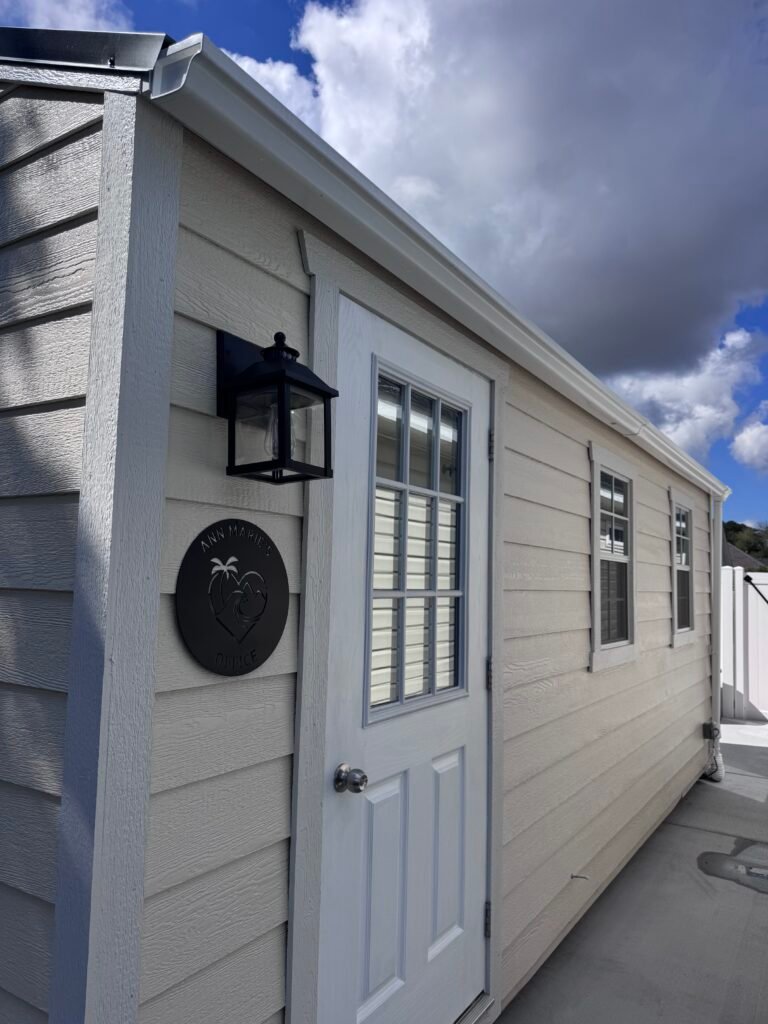
The shed being delivered!!
Step 2: My First Big DIY Lesson — Radiant Barrier Is NOT Insulation
When I purchased the shed, I was told the silver foil-looking material was insulation.
I believed it.
And I didn’t do my homework.
That one is on me!
Once I started researching how I was going to finish the walls, I discovered that what I actually had was a radiant barrier (as seen above in pictures), not traditional insulation.
That changed everything.
A radiant barrier is designed primarily to reflect radiant heat. It isn’t the same thing as filling your walls with insulation.
I also learned that the way radiant-barrier products perform depends on having the proper air space and installation, so I couldn’t simply cram insulation and wall panels against everything and call it finished.
DIY TIP: Always check the manufacturer’s installation directions for the specific radiant barrier and insulation you are using, and make sure your project meets your local building and electrical codes.
Suddenly, my beautiful vision of exposed black wall studs wasn’t looking very practical.
I had some thinking to do.
Step 3: Foam Board Insulation to the Rescue
I wasn’t giving up on the project.
Instead, I changed the plan.
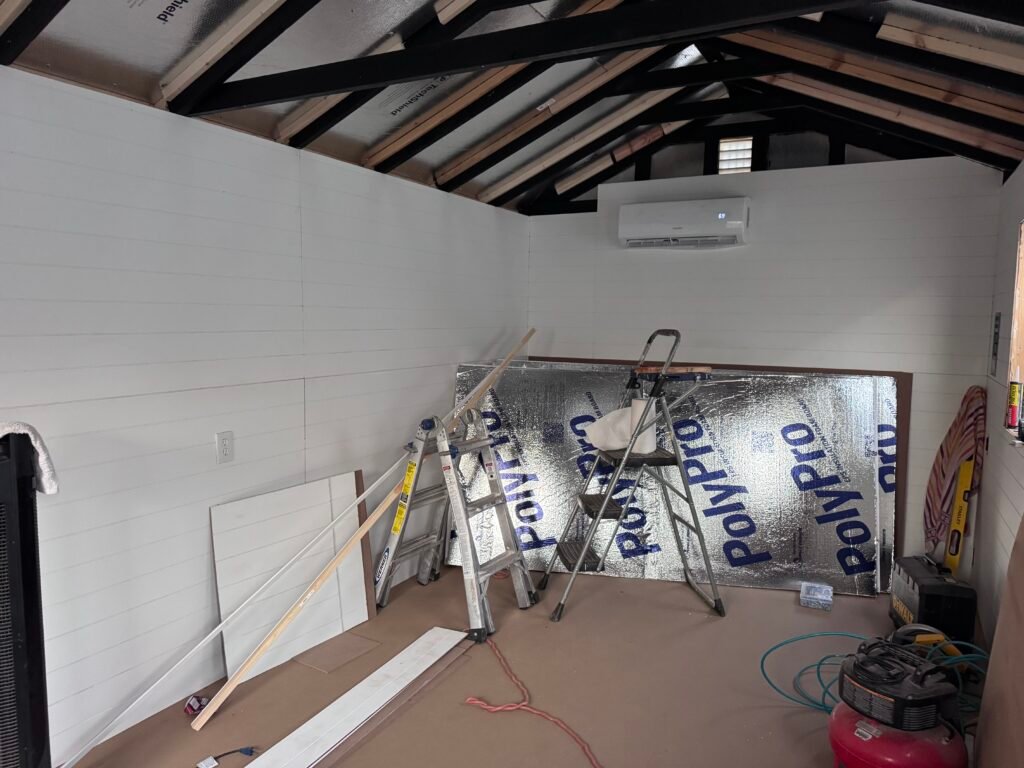
I purchased foam board insulation and cut it so that it would fit between the wall studs while maintaining the spacing needed for my setup.
It took more measuring.
More cutting.
More fitting.
And definitely more patience.
Once the insulation was installed, I realized my exposed wall-stud idea wasn’t going to work the way I originally envisioned.
So I made another adjustment.
Instead of placing the shiplap panels between the studs, I eventually installed the 4×8 shiplap panels over the framing.
Was it exactly what I had pictured when I started?
No.
Did it work?
Absolutely.
And now that the room is finished, I actually love the clean white walls.
Step 4: But I Was NOT Giving Up My Black Ceiling Beams!
There was one thing I wasn’t willing to let go of:
Those exposed ceiling beams.
I wanted them BLACK.
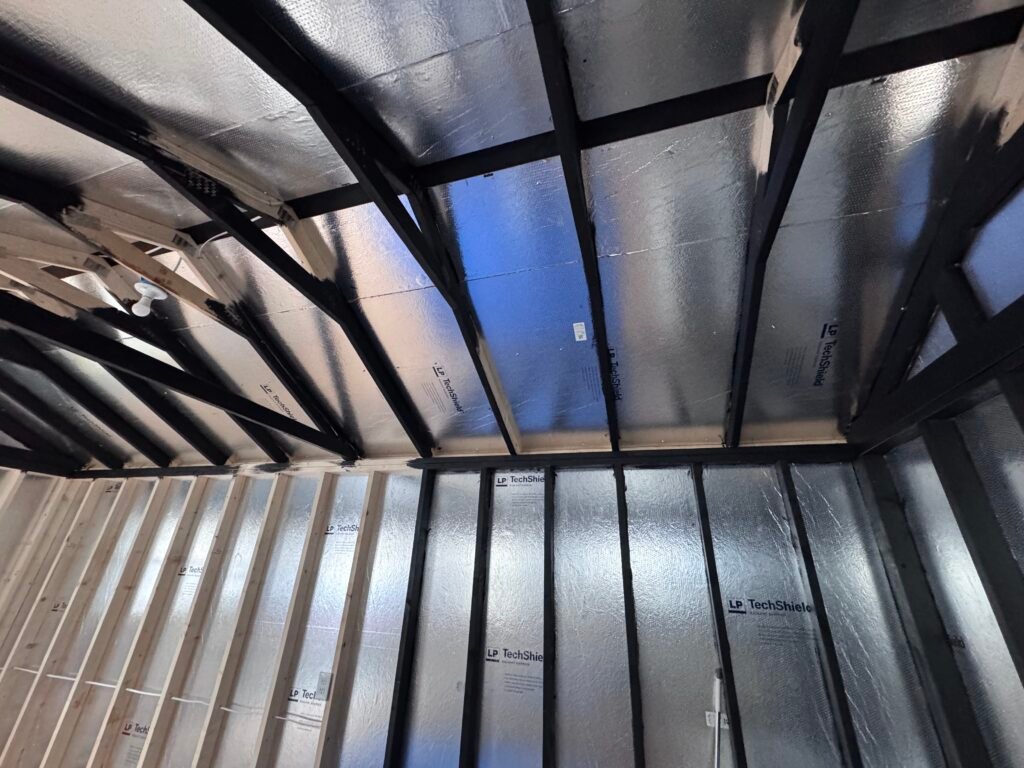
I loved the contrast of black beams against a white ceiling, so I started figuring out how I could insulate the ceiling without hiding them.
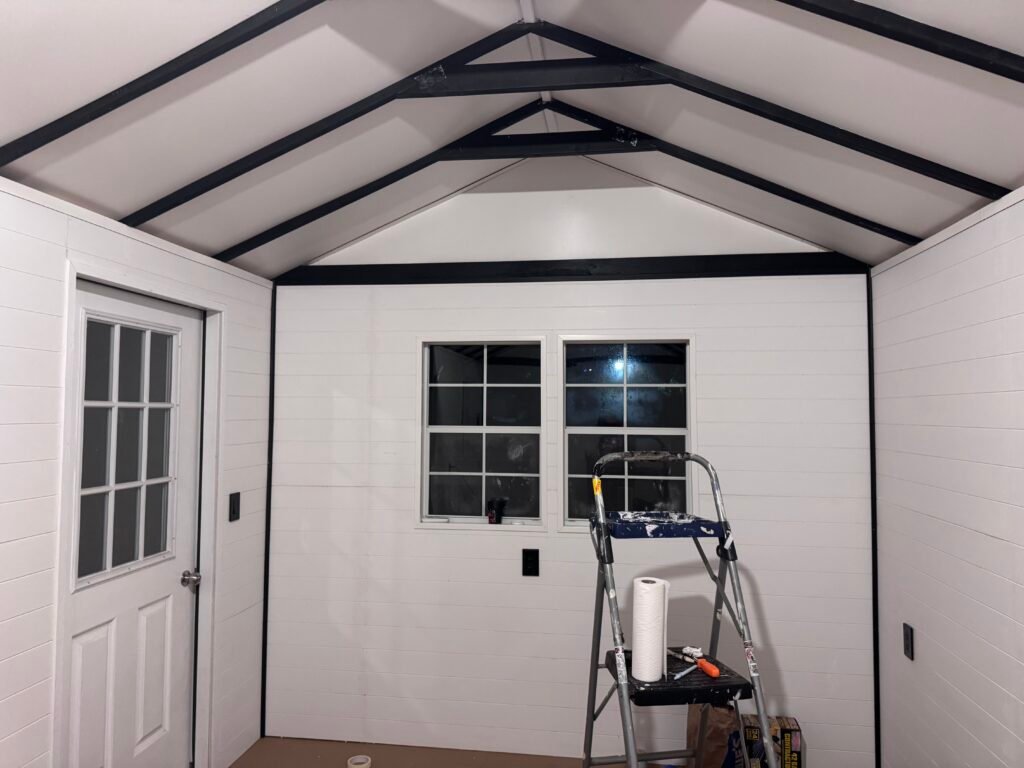
For the ceiling, I used approximately ½-inch foam board insulation and covered it with plain white panels positioned between the rafters.
That gave me the insulation I needed while still allowing those gorgeous structural lines to remain visible.
Then I painted the exposed beams black.
This was the moment when the room finally started looking like the space I had imagined.
The white ceiling made everything feel larger and brighter, while the black beams gave it character.
Step 5: Installing the Shiplap Walls
Next came the walls.
I used the white 4×8 shiplap-style panels to cover the framing.
One thing I really liked about using panels instead of individual shiplap boards was how quickly they covered a large area.
Of course, nothing involving windows, outlets, doors and corners is quite as easy as it looks!
There was plenty of:
- Measuring
- Cutting
- Re-measuring
- Fitting
- And occasionally wondering why something I KNOW I measured suddenly didn’t fit!
If you do DIY projects, you know exactly what I’m talking about.
But little by little, that construction shed started turning into a room.

Step 6: South Carolina Heat Meant One Thing — AIR CONDITIONING
Living in South Carolina, heating and cooling this space wasn’t optional.
It gets HOT.
It gets HUMID.
And I was not building my dream she shed just to sit inside and melt!
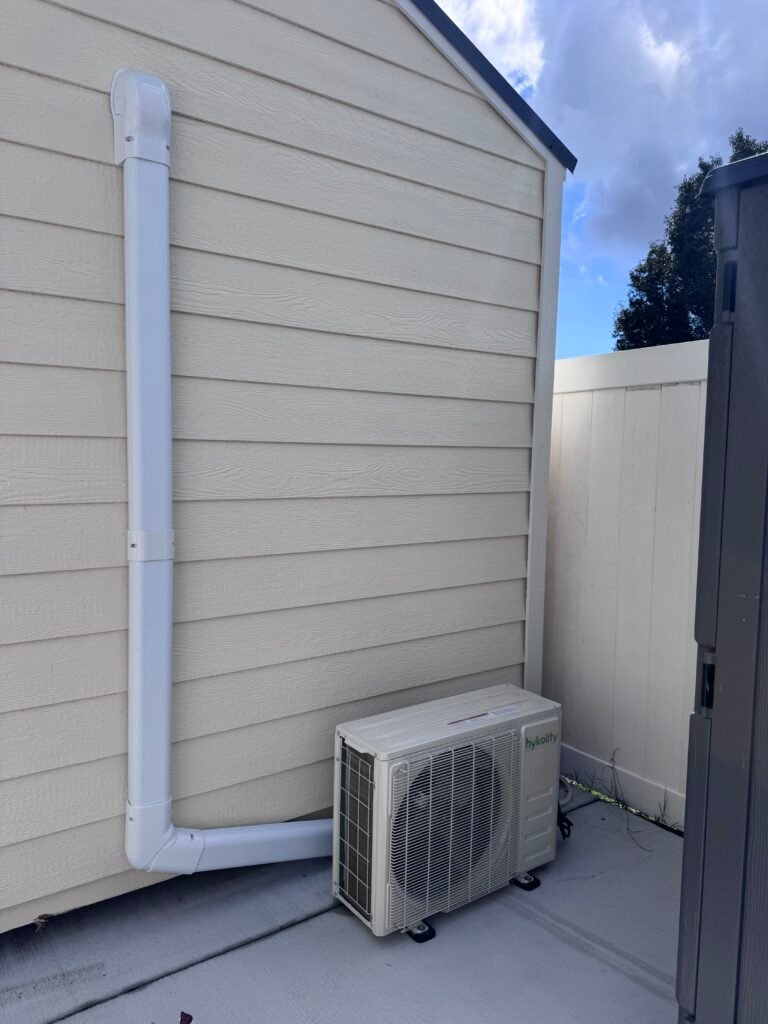
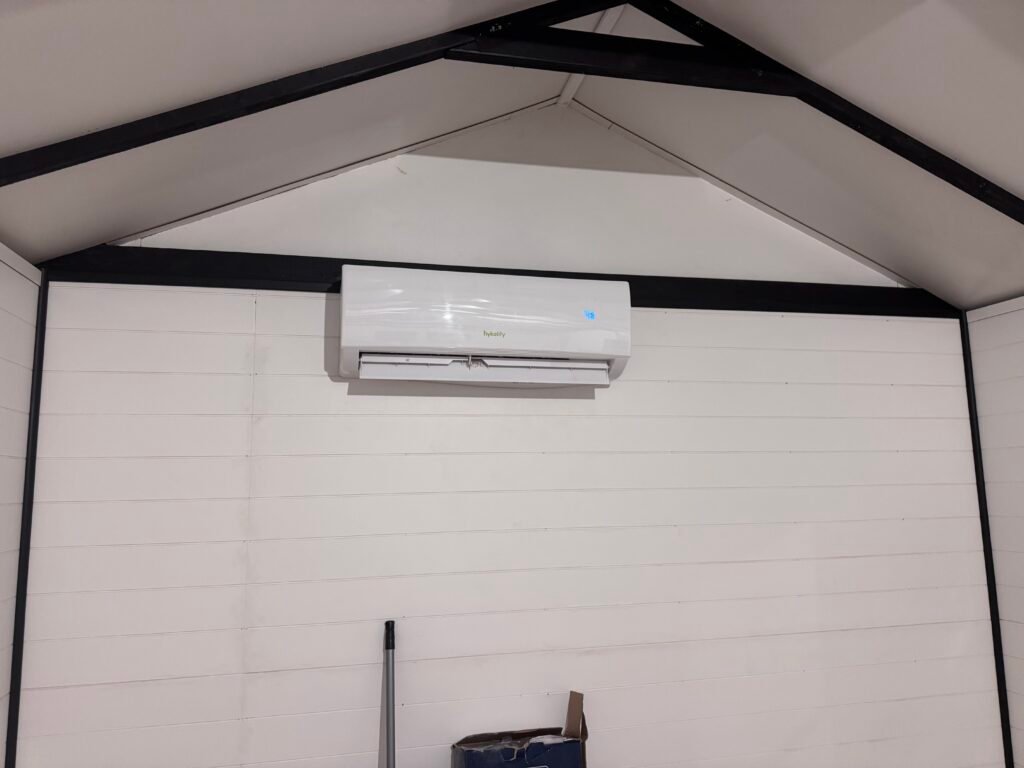
So we installed a mini-split heating and air-conditioning unit.
This was one of the most important additions I made.
Now I can use my shed throughout the year instead of only during a few comfortable months.
It cools the space in summer and provides heat when the temperatures drop.
And just as important to me, it helps control that South Carolina humidity.
Of course, I wanted it centered, but hubby said we needed to use the studs to hang it….so yest, another thing I gave up!!
Step 7: Upgrading the Electrical System
Because I planned to use this shed as a real workspace—and because I was adding a mini-split heating and air-conditioning unit—I knew I needed to make sure the electrical setup could safely handle everything.
This was one part of the project I did not DIY.
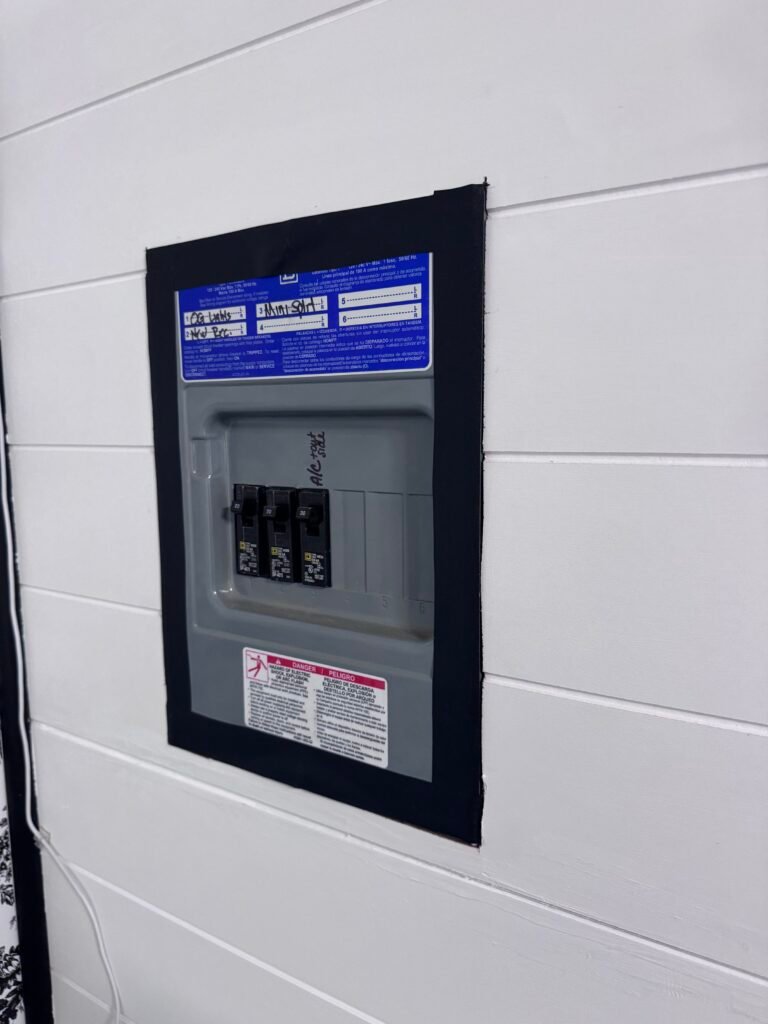
I hired a licensed electrician to install a small electrical panel in the shed so we could separate the electrical load onto different breakers.
The shed originally came with three outlets, and we kept those on their original breaker.
While the electrician was there, I had him add three additional outlets, which gave me much more flexibility for my desk, printer, refrigerator, TV, lighting and other electronics.
We ended up with:
- The original three outlets staying on their original breaker
- A second breaker for the three new outlets
- A dedicated breaker for the mini-split unit
Having the mini split on its own breaker was especially important to me because I wanted the heating and cooling system separated from everything else I would be plugging in around the room.
This was definitely money well spent. With computers, printers, lights, a refrigerator, a TV and everything else I planned to use in the shed, I felt much better knowing the electrical system had been professionally set up for the way I intended to use the space.
DIY TIP: Electrical work is one area where I recommend bringing in a licensed professional. They can determine the proper breaker sizes, wiring, outlet placement and electrical requirements for your specific equipment and local code.
Step 8: My Dollar Tree Find That Became an Accent Wall
Then came one of my FAVORITE parts of this project.
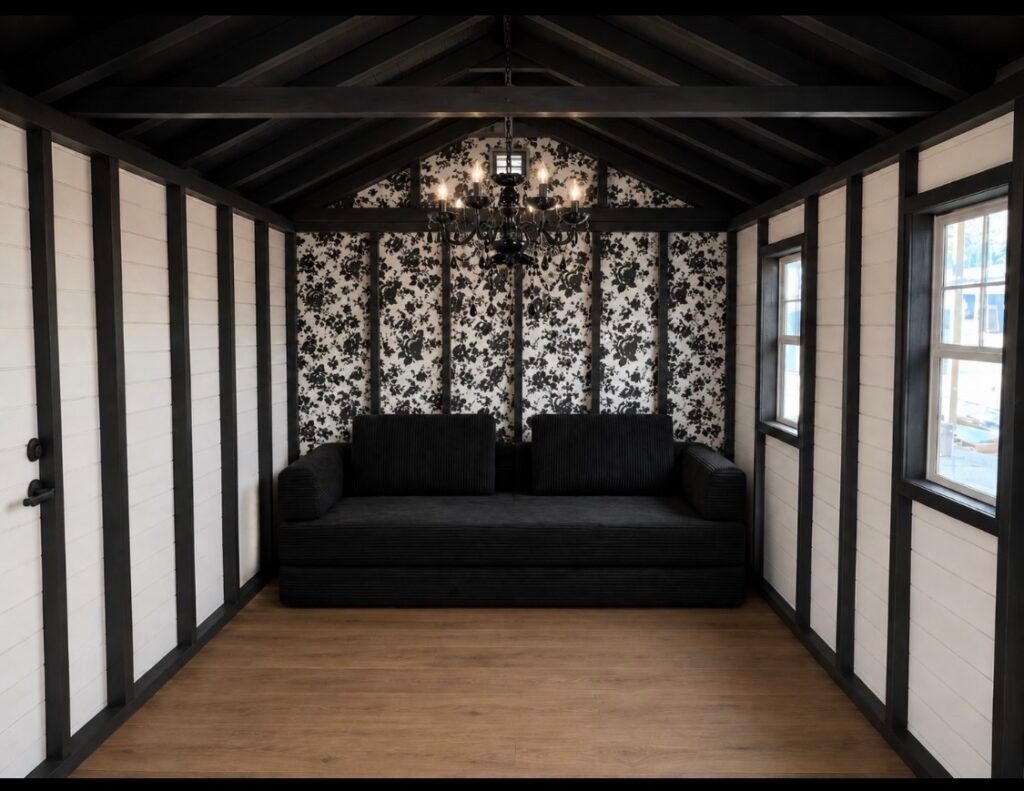
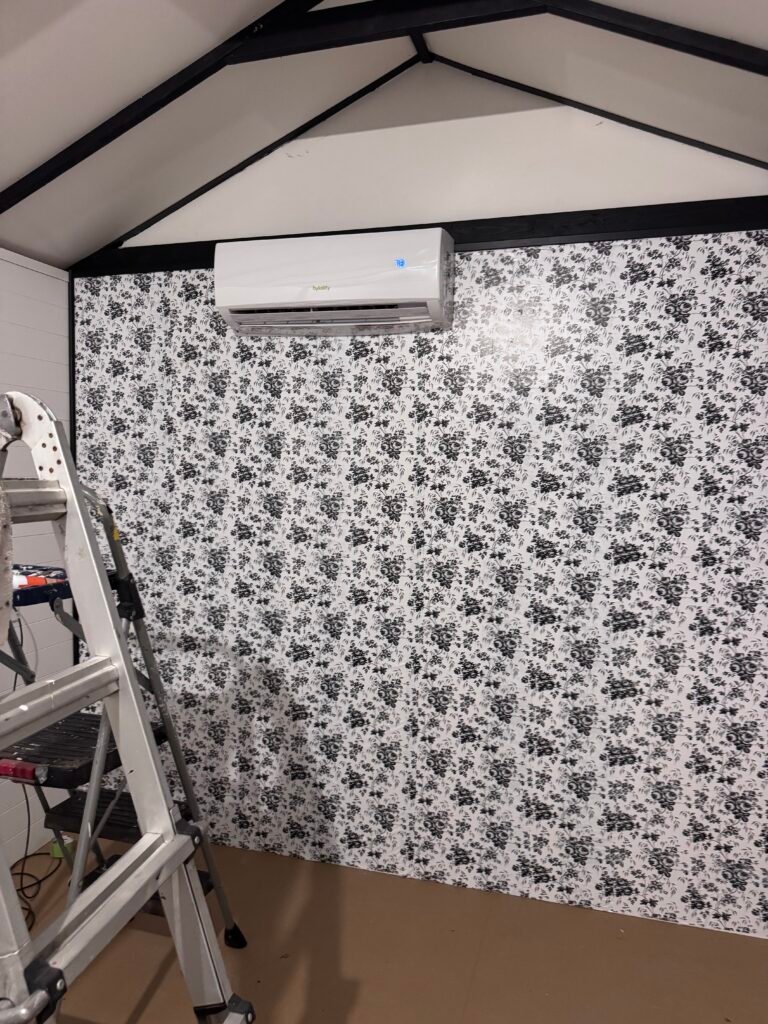
I found this gorgeous black-and-white floral shelf liner at Dollar Tree.
Did I know exactly where I was going to use it when I bought it?
Nope.
Did I know that I absolutely, positively NEEDED to use it somewhere?
Then came one of my FAVORITE parts of this project.
I found this gorgeous black-and-white floral shelf liner at Dollar Tree.
Did I know exactly where I was going to use it when I bought it?
Nope.
Did I know that I absolutely, positively NEEDED to use it somewhere?
YES.
Eventually I decided to put it on the wall behind the mini split.
And look at it!
I love how it turned out.
The floral pattern gives the room personality while still working perfectly with the black-and-white color scheme.
It also proves something I say all the time:
Something doesn’t have to be expensive to completely change the look of a room.
Sometimes the inexpensive little find becomes the thing everyone notices.
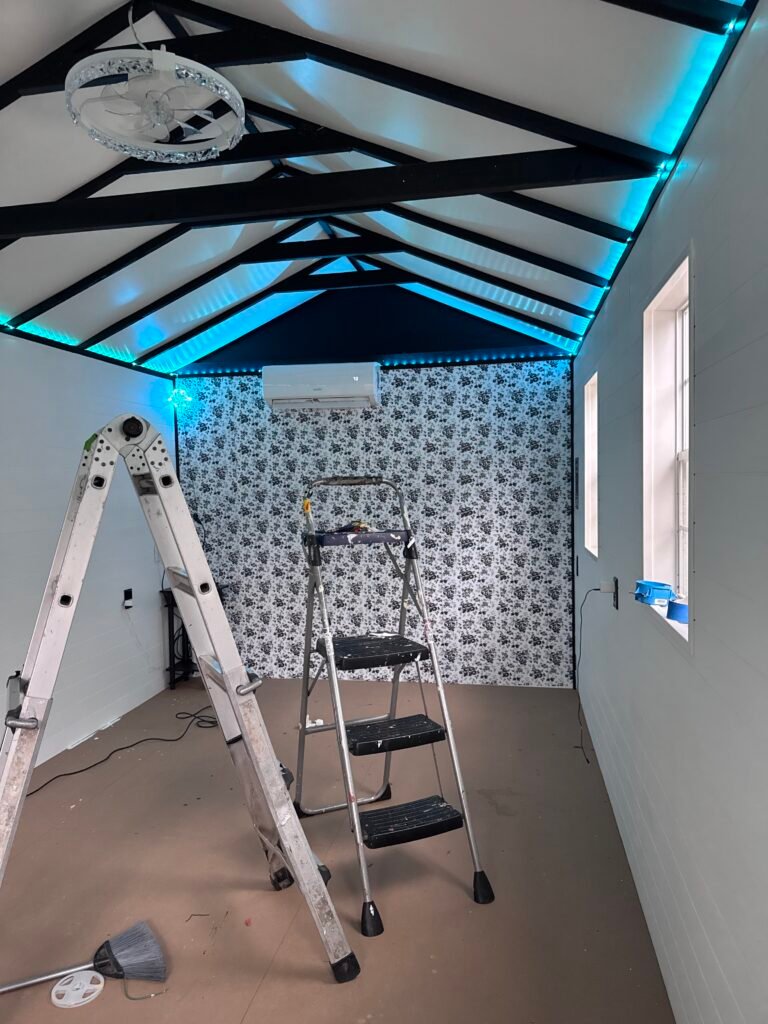
I can tell you that these prints did not line up, so I had a very difficult time trying to match the
patterns…but honestly, I made so many mistakes, you can’t even tell!!
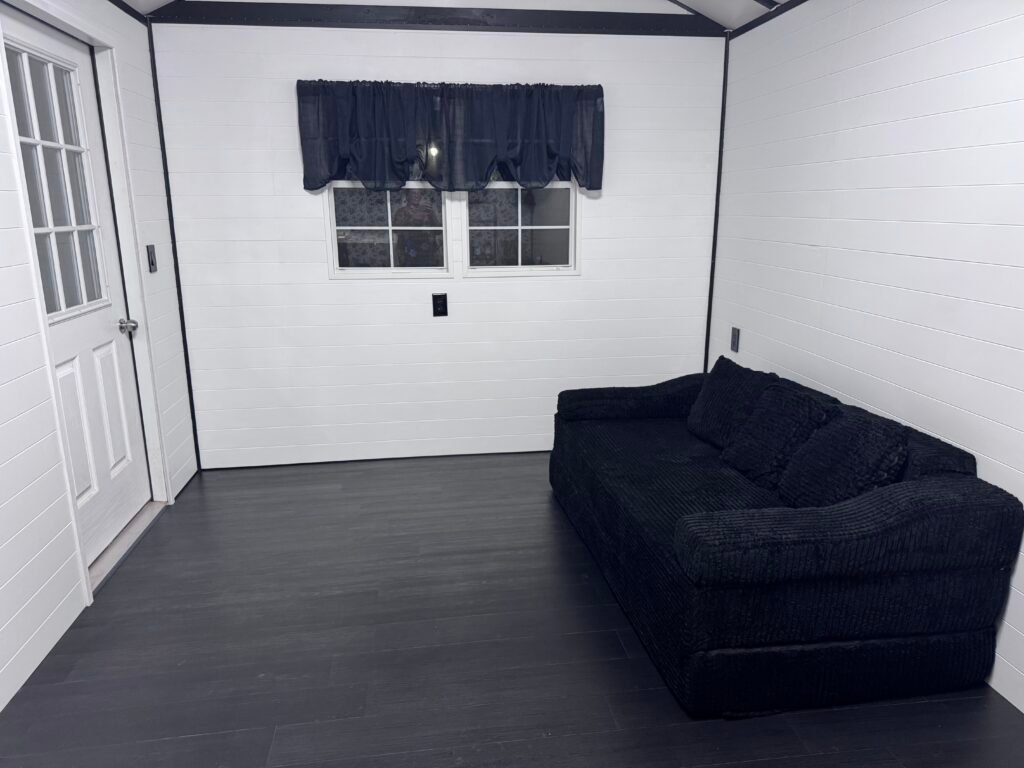
Step 9: Installing an Easy DIY Floor
The original shed floor obviously wasn’t staying.
I found an inexpensive adhesive vinyl flooring that I could cut with a razor blade and install myself.
For a DIY space like this, that was exactly what I wanted.
No complicated equipment.
No elaborate installation.
Just measure, cut and install.
The new flooring immediately made the shed feel less like a shed and more like an actual room.
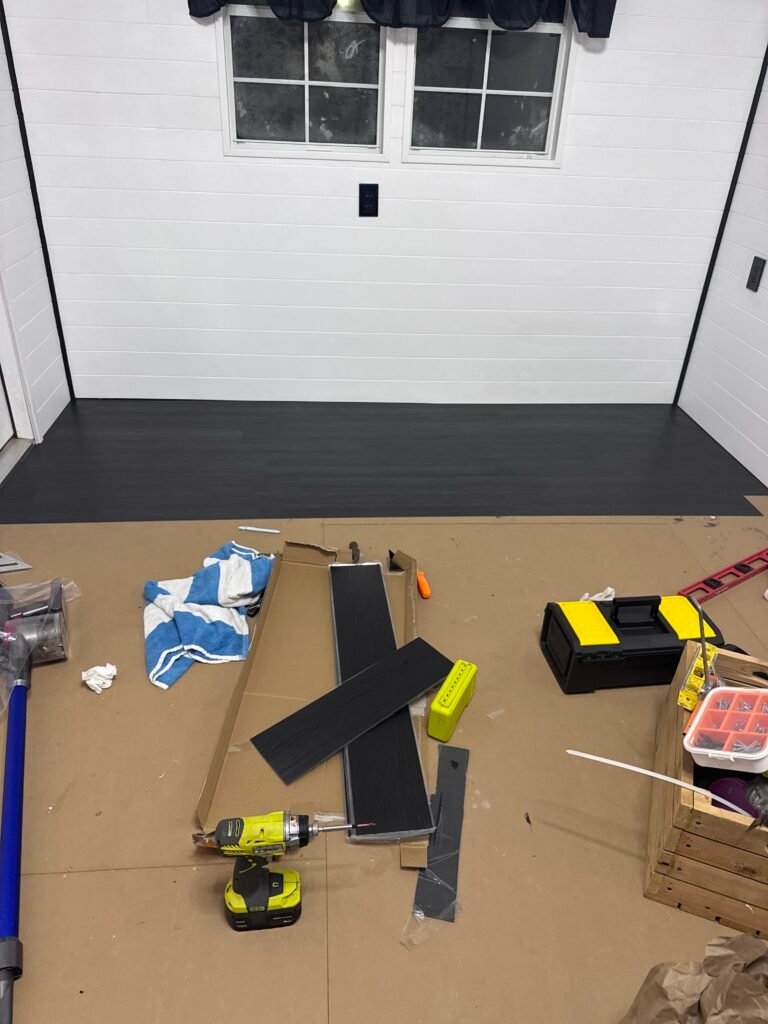
I suggest wearing knee pads!!! Or lay a towel down like I did until my husband told me we had knee pads!!!
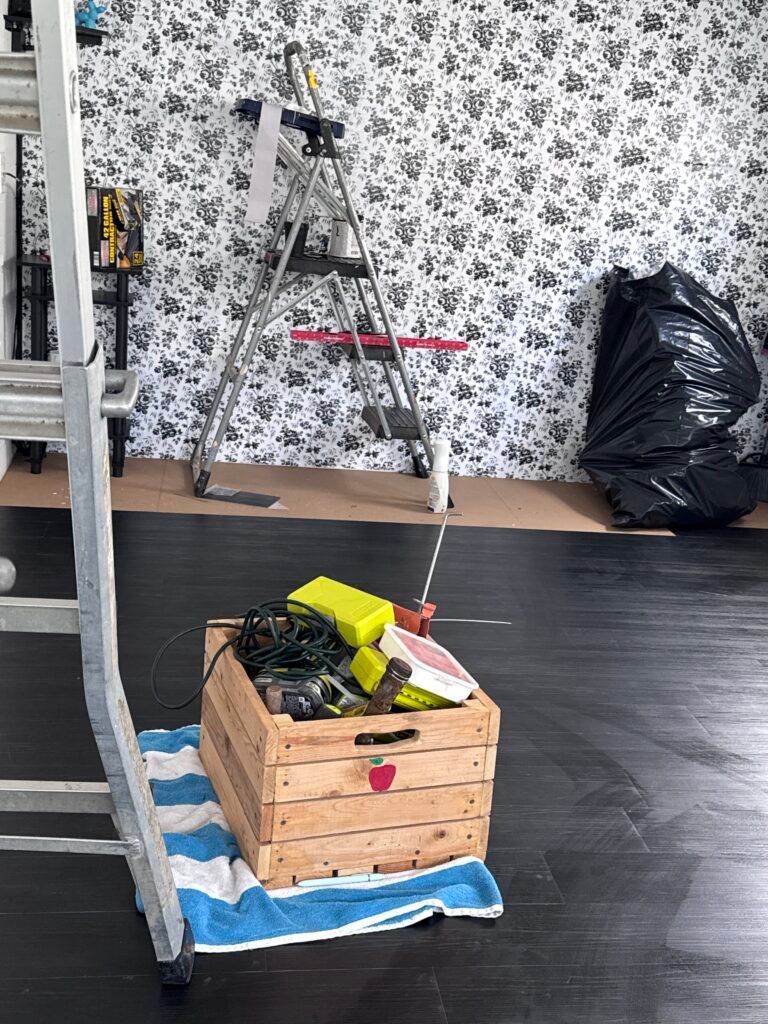
Step 10: Making the Windows Pretty AND Practical
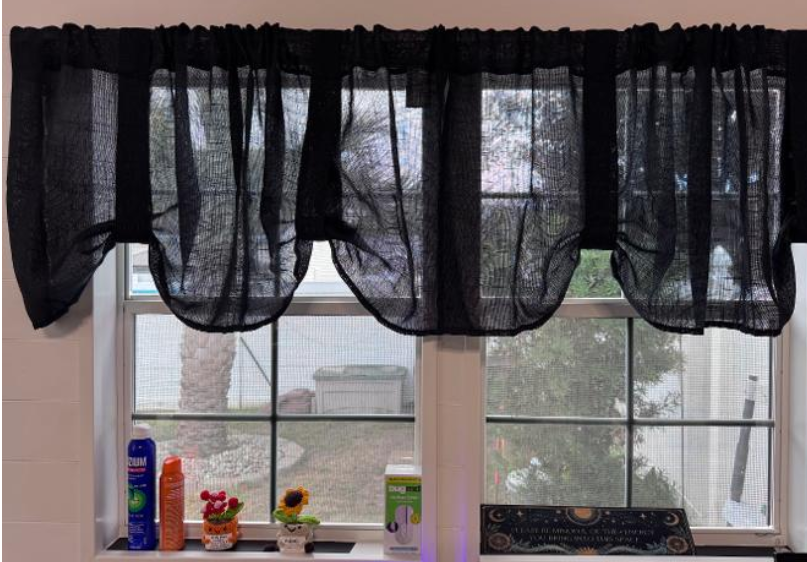
Since the shed has several windows, I wanted to keep all of that wonderful natural light.
But again…
South Carolina sun.
I added window tint film to help reduce some of that intense sunlight and heat.
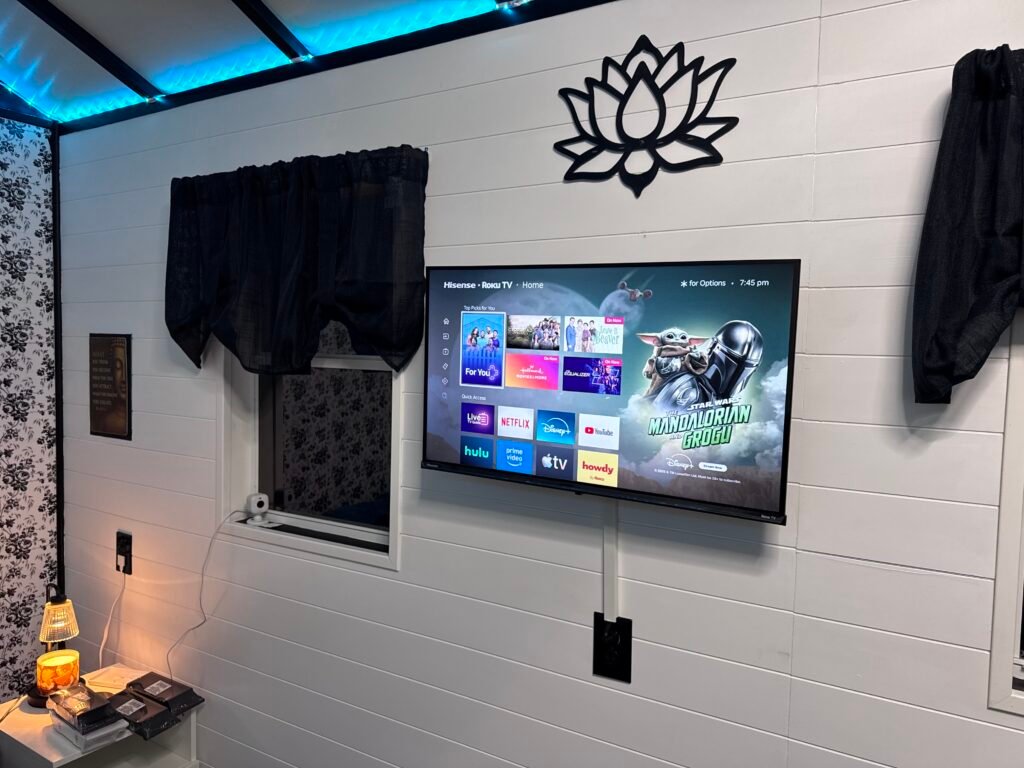
Then I found inexpensive valance curtains to soften the windows and make everything feel more finished.
It’s amazing what window treatments can do.
You can go from “work shed” to “cozy little room” surprisingly fast with a few pieces of fabric.
Step 11: The Light Fixture That Does Double Duty
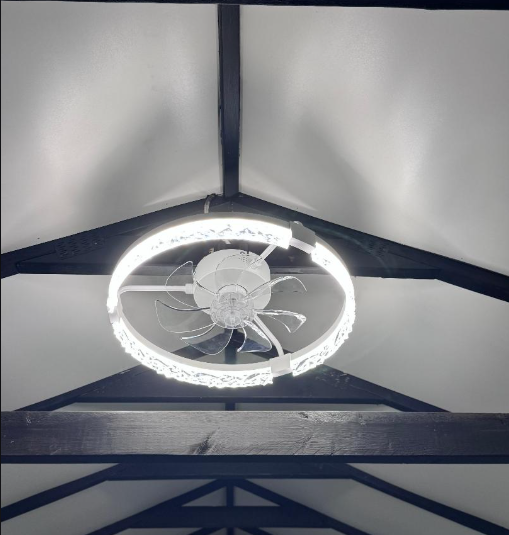
This may be one of the smartest things I added.
My ceiling light has a built-in fan.
I love it.
The light is bright enough for me to work in the room, while the fan helps circulate the air from the mini split.
That means the cool air gets moved around in the summer and the warm air circulates better during cooler weather.
When you’re working with only 200 square feet, I am all about finding things that can perform more than one job.
Step 12: Adding LED Lights Around the Ceiling
Then I added the fun.
I ran LED strip lights around the perimeter of the ceiling.
And wow.
At night, the entire personality of the room changes.
The lights highlight those black ceiling beams and give the shed such a fun atmosphere.
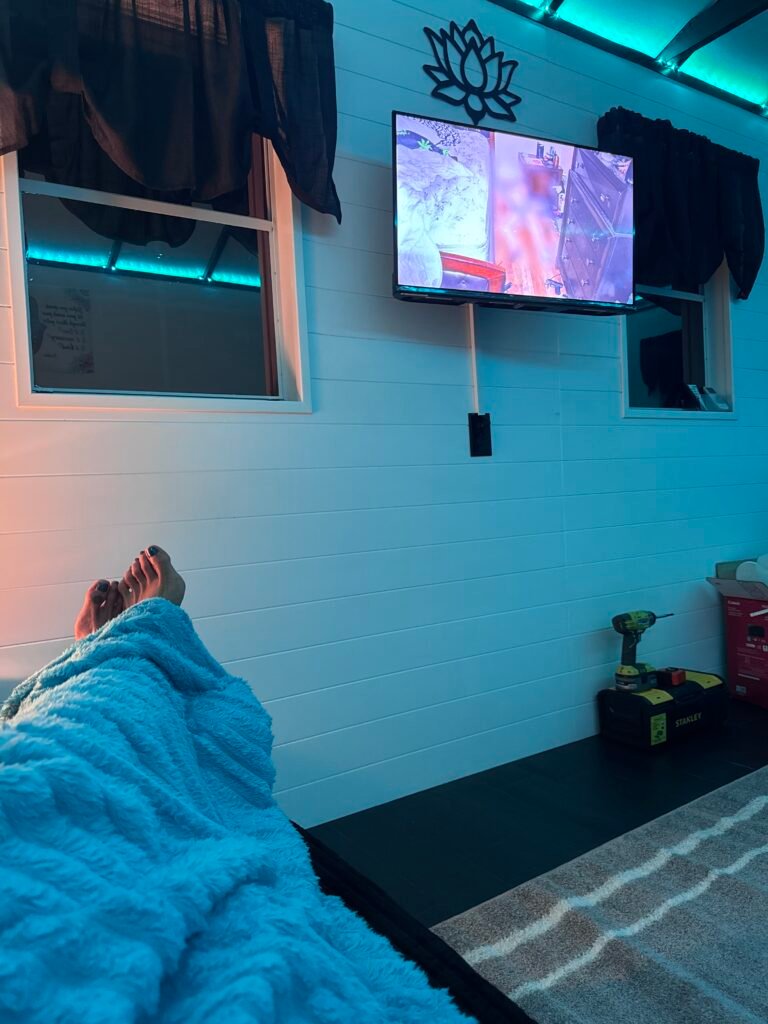
I can change the lighting depending on what I’m doing—working, relaxing, watching TV or just enjoying my little hideaway.
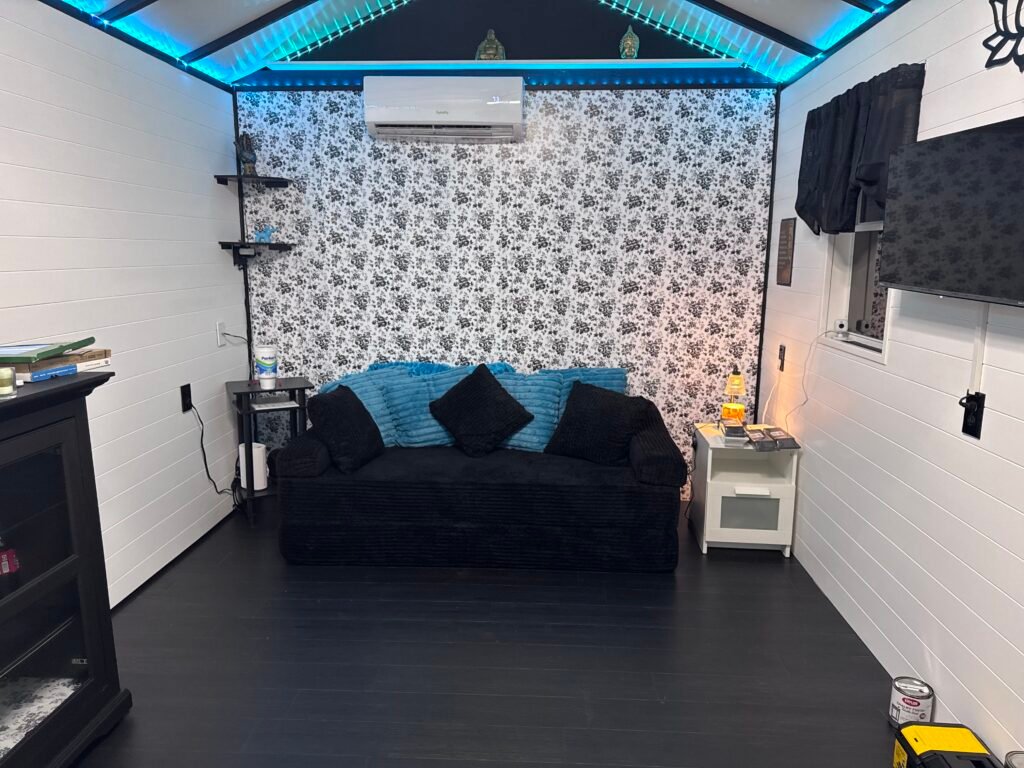
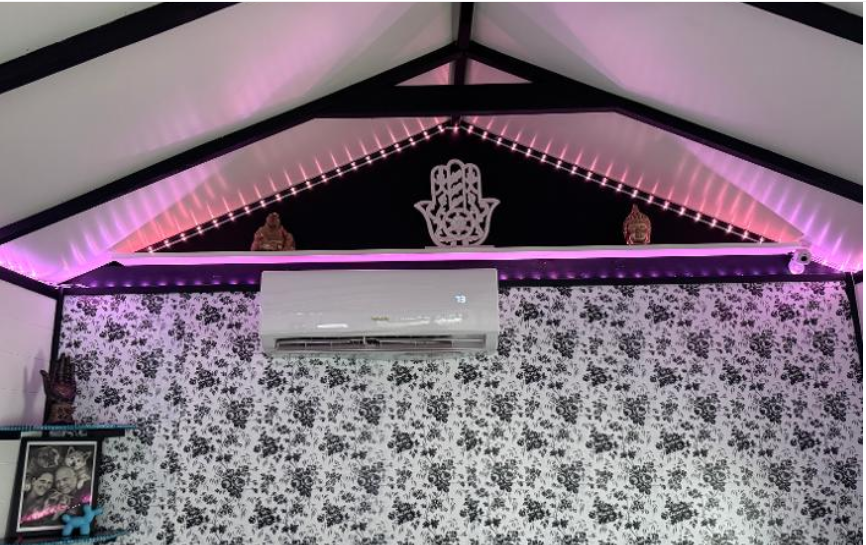
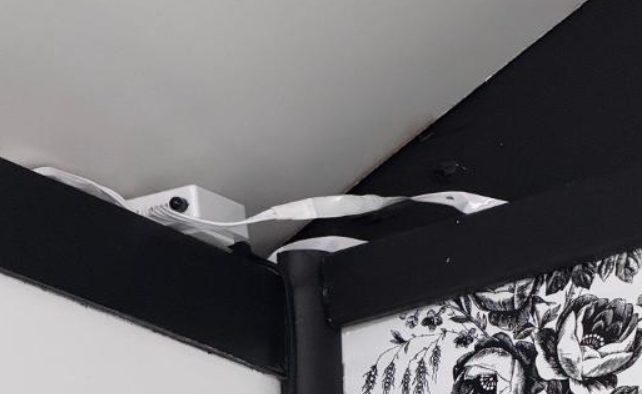
I tucked the transponder into the far back corner! works like a charm!!!
Step 13: Furniture That Has to Work Hard in a Small Space
With a 10×20 room, every piece of furniture has to earn its place.
I found a couch for under $200 that also converts into a bed.
That was perfect.
Most of the time, it gives me a comfortable place to sit.
But when someone stays over, they have their own private sleeping space.
I also added:
- My desk and workspace
- A television
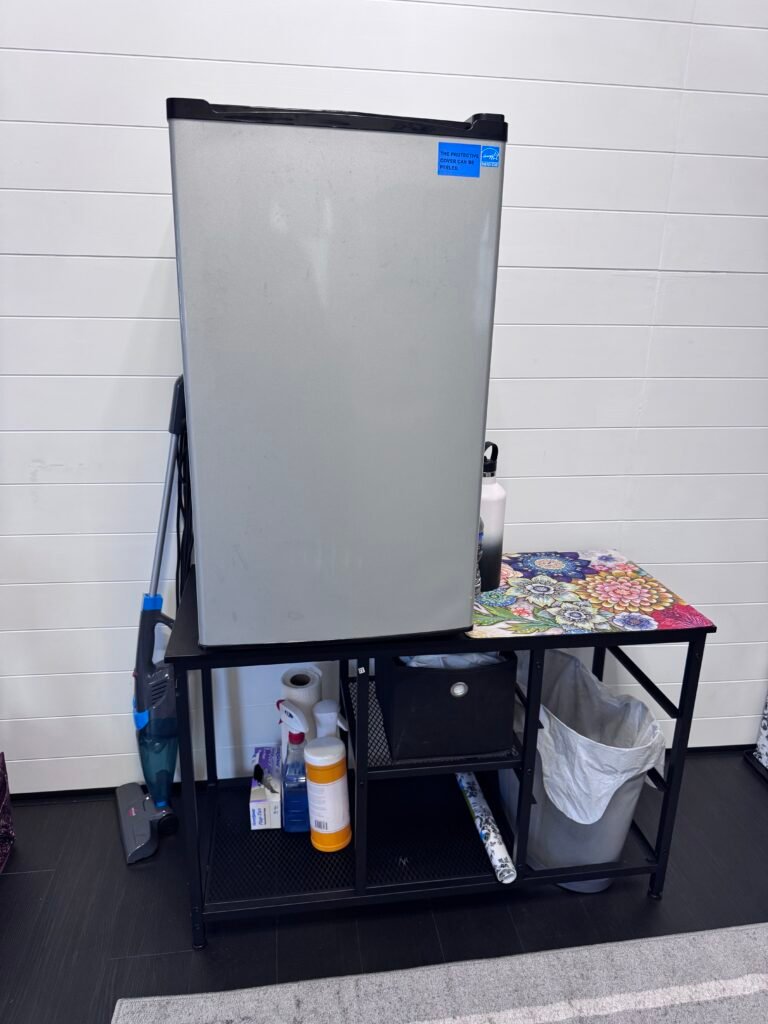
- A small refrigerator
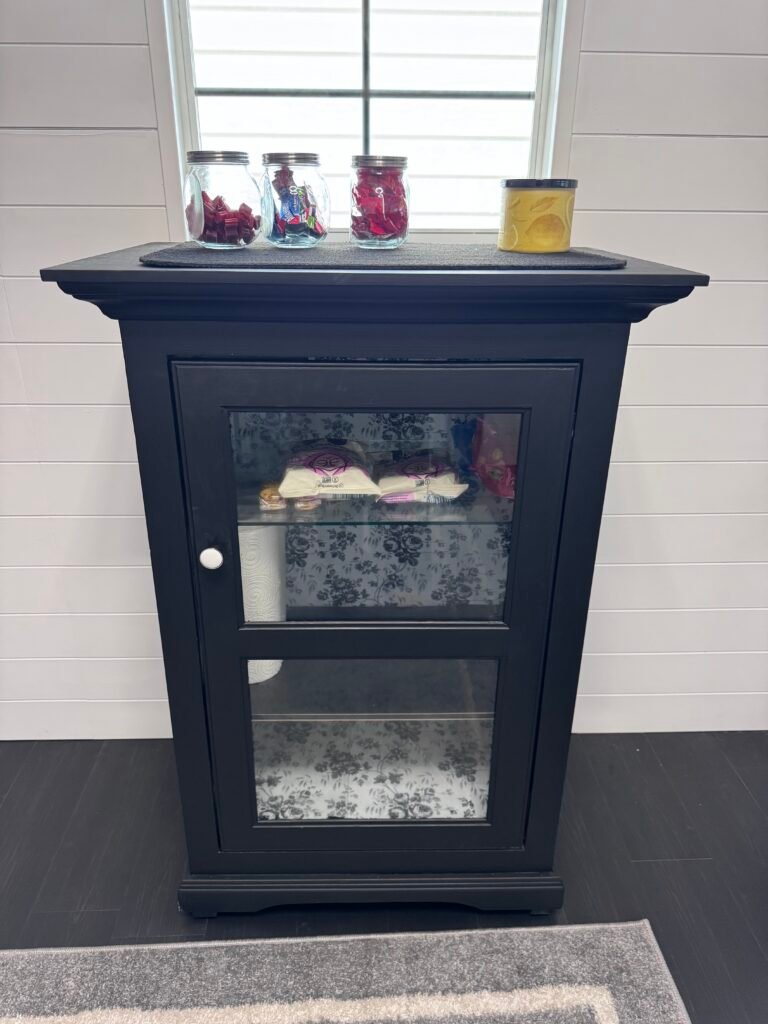
- Storage
- Decorative accessories
- Comfortable seating
So this little shed isn’t just one thing.
It’s my workspace.
It’s my relaxation space.
It’s a guest room.
And sometimes it’s just where I go when I want a little peace and quiet.
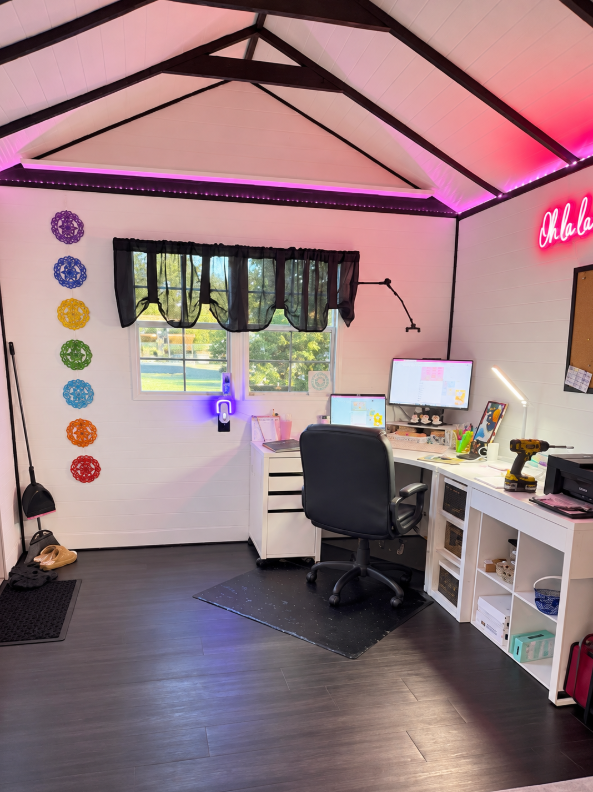
And Yes…I Put a Toilet in My She Shed 😂
This may be my favorite practical decision.
I bought an RV-style portable toilet.
Because listen…
At my age, when it’s time to go, there is no time to waste!
😂
I’m not running across the yard and into the house every time nature calls.
The portable toilet is simple to clean and perfect for occasional use.
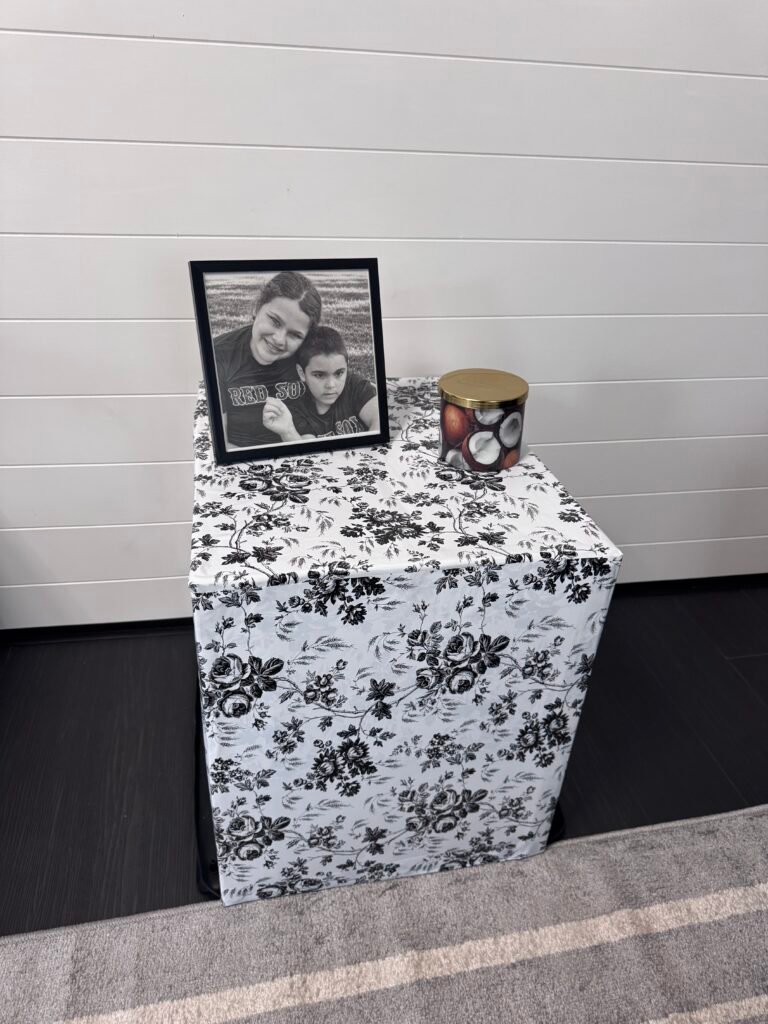
But I didn’t want to LOOK at a toilet sitting in my pretty she shed.
So I made a cover for it and used the same Dollar Tree floral shelf liner from my accent wall.
Practical?
Yes.
Pretty?
Also yes.
Problem solved.
My Finished She Shed: Not Exactly the Original Plan — But Maybe Even Better
When I look back at that first picture of the empty 10×20 shed, it’s hard to believe it’s the same building.
My original vision changed.
More than once.
I learned about radiant barriers.
I learned about insulation.
I changed my wall plans.
I figured out how to save the exposed black ceiling beams I loved.
I insulated.
Paneled.
Painted.
Papered.
Floored.
Decorated.
And probably made about a hundred little decisions along the way.
But that’s what I love about DIY.
Your first idea doesn’t have to be your final idea.
Sometimes the problem that makes you rethink everything ends up giving you an even better result.

If You’re Thinking About Building a She Shed…
My biggest advice is this:
Start with the vision, but be willing to change the plan.
Research your insulation before you cover the walls.
Think about heating and cooling before decorating.
Use every inch wisely.
Choose furniture that can serve more than one purpose.
And don’t overlook inexpensive places when you’re looking for decor.
My Dollar Tree shelf liner ended up creating one of my favorite walls in the entire room!
Most importantly…
Make the space YOURS.
Your she shed doesn’t have to look like anyone else’s.
Mine is part office, part guest room, part craft/work space, part hangout and 100% me.
And I wouldn’t have it any other way.
My She Shed Project at a Glance
Size: 10×20 feet
Style: Black + white modern farmhouse with a little feminine personality
Walls: White shiplap-style panels
Ceiling: White panels with exposed black beams
Insulation: Foam board used as part of the insulation plan
Heating/Cooling: Mini-split system
Accent Wall: Black-and-white floral shelf liner
Floor: Adhesive vinyl flooring
Lighting: Ceiling light with built-in fan + LED strip lighting
Furniture: Convertible couch/guest bed, desk/workspace
Extras: TV, mini refrigerator and portable RV toilet
