
This post contains affiliate links which means if you make a purchase after clicking a link I will earn a small commission but it won’t cost you a penny more
13 Paint Hacks to Make your next Project Easier
👉GET YOU FREE PRINTABLE PAINTING GUIDE HERE
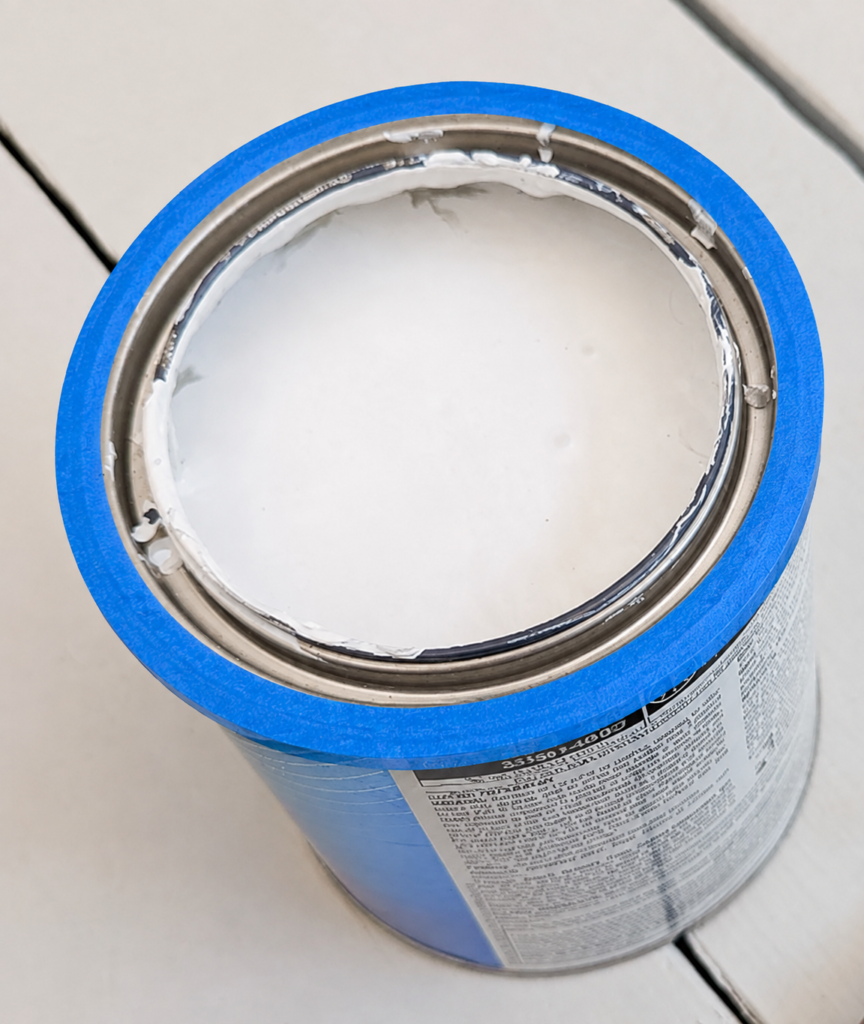
1. Protect the Rim of Your Paint Can with Painter’s Tape
Paint tends to collect inside the rim of the can as you work. Once that paint dries, it can become difficult to properly close the lid, which may allow air inside and cause your leftover paint to dry out.
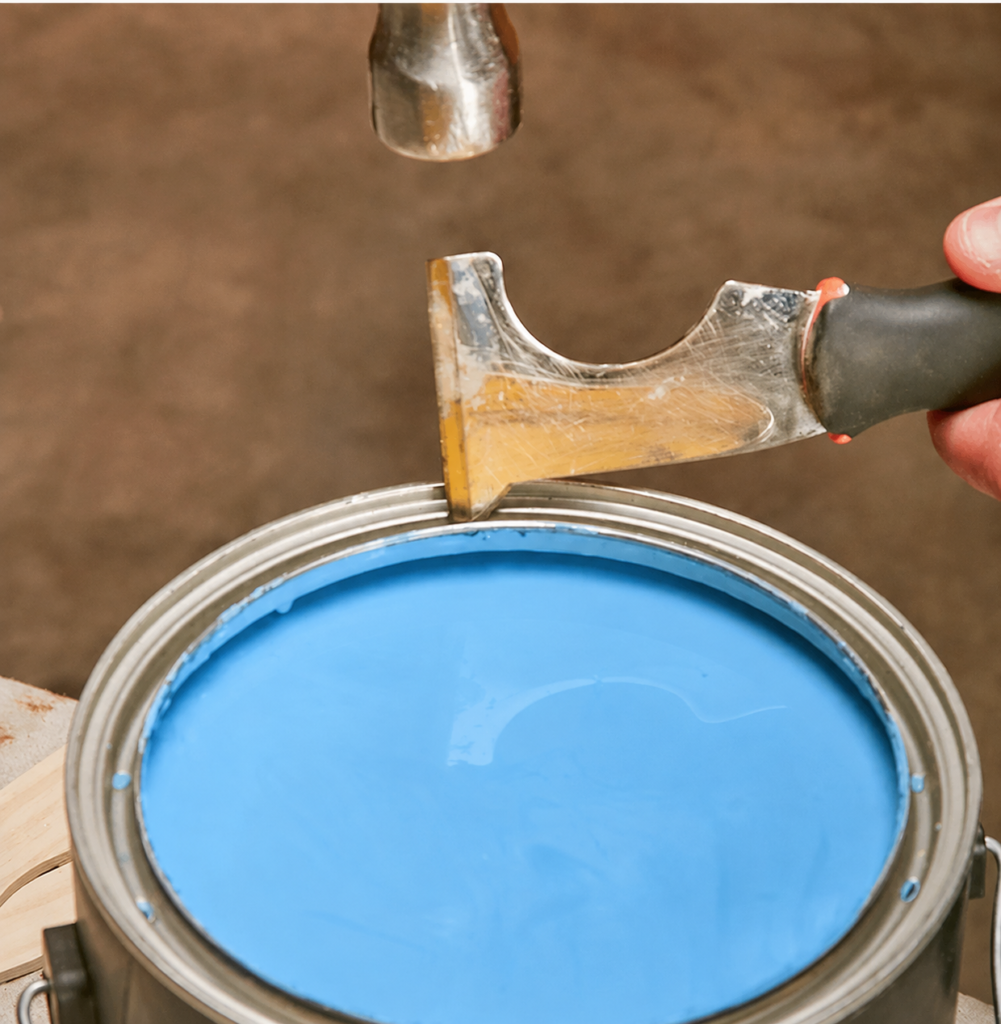
Before you start painting, apply blue painter’s tape around the top edge of the can, covering the recessed groove where excess paint tends to collect. For even more protection against messy splatters, use the pointed end of an 8-in-1 paint brush comb and roller-cleaning tool to make several small drainage holes in the rim’s groove. Carefully wiggle the tool from side to side to widen each opening slightly. Any paint that gathers in the groove can then flow back into the can instead of spraying out when you tap the lid closed. The lid will cover the holes and still create a secure seal. You can also use a hammer and nail to make the holes when an 8-in-1 tool is not available.
When you are finished, carefully remove the tape and throw it away. The rim stays much cleaner, the lid is easier to close, and the can will be easier to open the next time you need it.
2. Wrap a Rubber Band Around the Paint Can
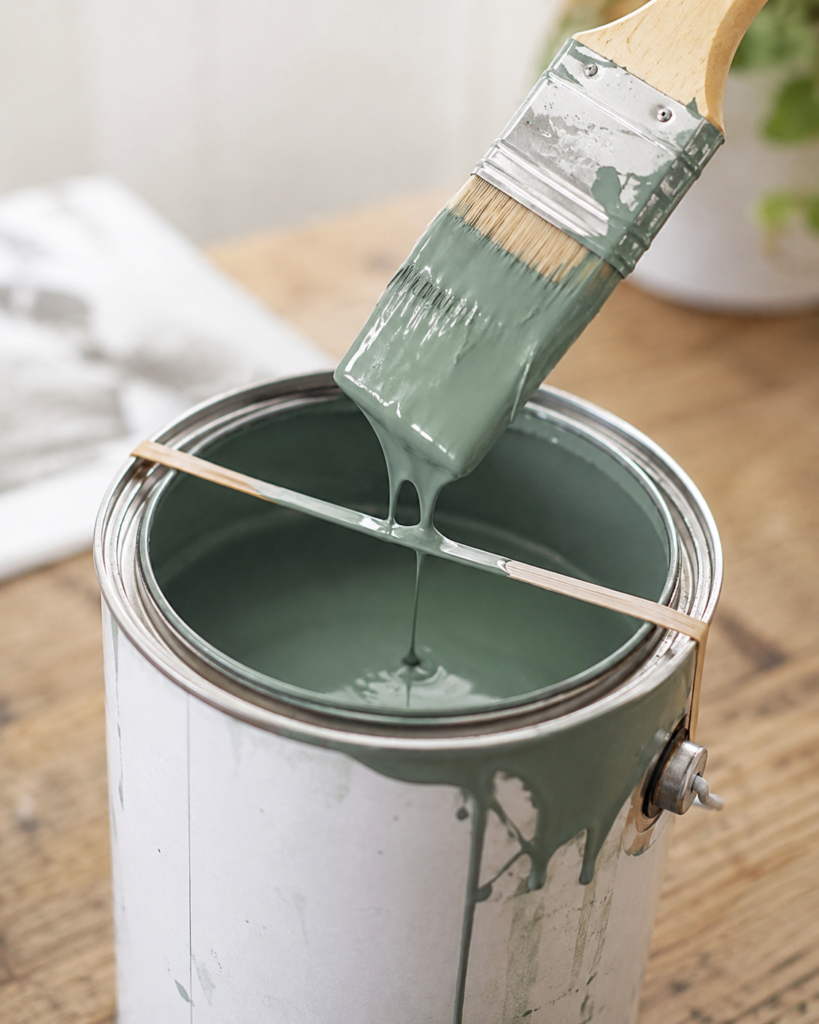
When you dip a paintbrush into the can, you need somewhere to wipe away the excess paint. Wiping the brush against the side of the can causes paint to build up around the rim and drip down the outside.
Instead, stretch one large rubber band—or a few thinner rubber bands—vertically around the paint can. Wipe your brush against the rubber band to remove the extra paint.
I had seen this hack shared many times and was skeptical about whether it would really work, but it actually works very well!
Just be careful when removing the rubber band afterward. If the paint is still wet, the band can snap back and splatter paint.
3. Remove Loose Fuzz from New Paint Rollers
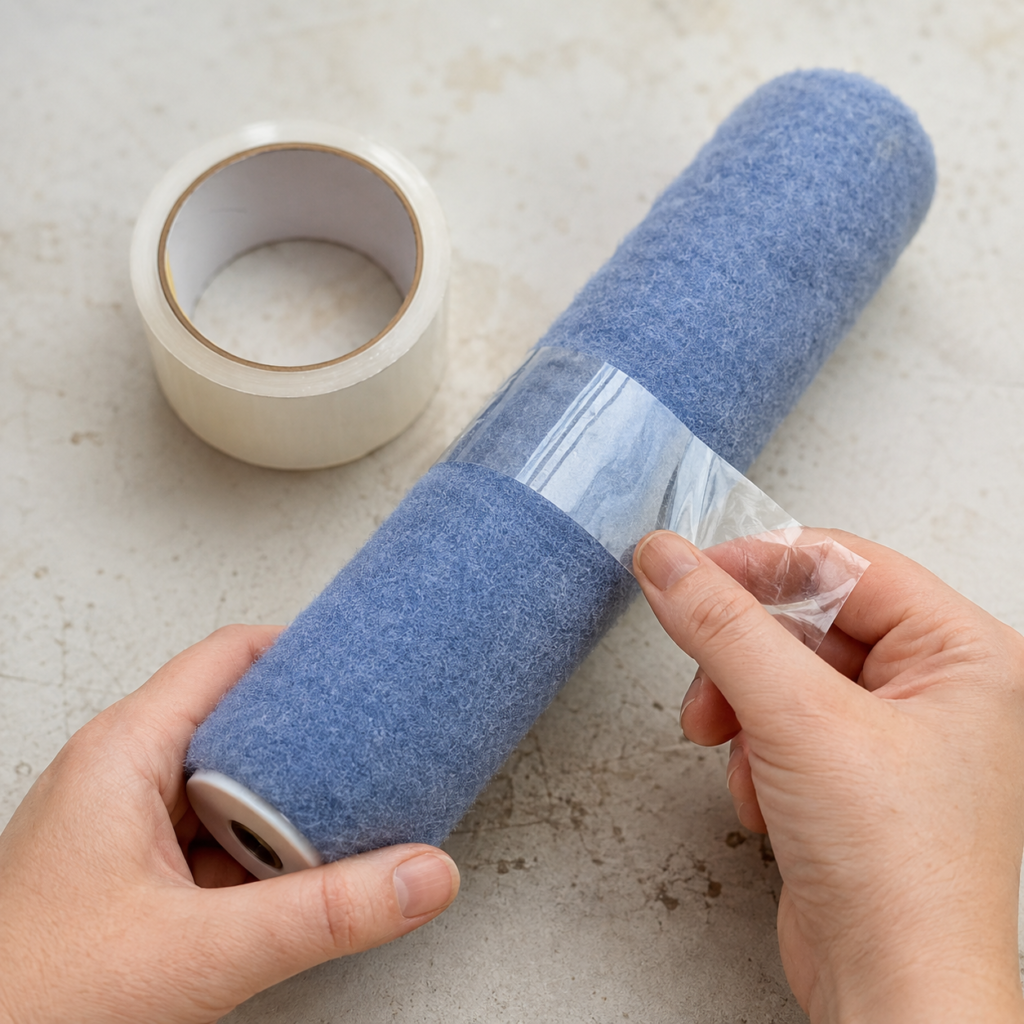
Brand-new paint roller covers can shed loose fibers and leave little fuzzies behind in your freshly painted surface.
Before using a new roller, lightly press painter’s tape or packing tape against the roller cover. The loose fibers will stick to the tape instead of ending up on your wall.
Do not press too firmly, especially when using strong packing tape, because you do not want to damage the roller’s nap.
This step is unnecessary when using a foam roller.
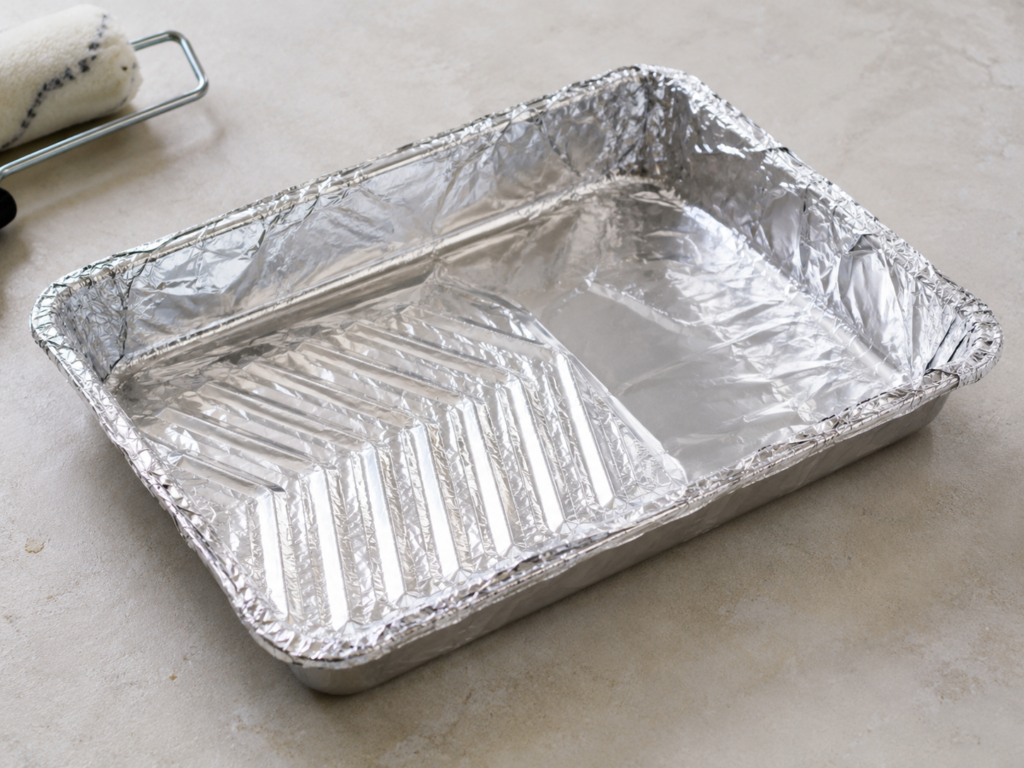
4. Line Your Paint Tray with Aluminum Foil
Disposable paint tray liners are convenient, but aluminum foil works just as well and is usually something you already have at home.
Cover the inside of your paint tray with foil before pouring in the paint. Press it gently into the corners so it follows the shape of the tray.
When you are finished painting, allow the remaining paint to dry, remove the foil, and dispose of it. Your paint tray stays clean, and you avoid spending extra money on plastic liners.
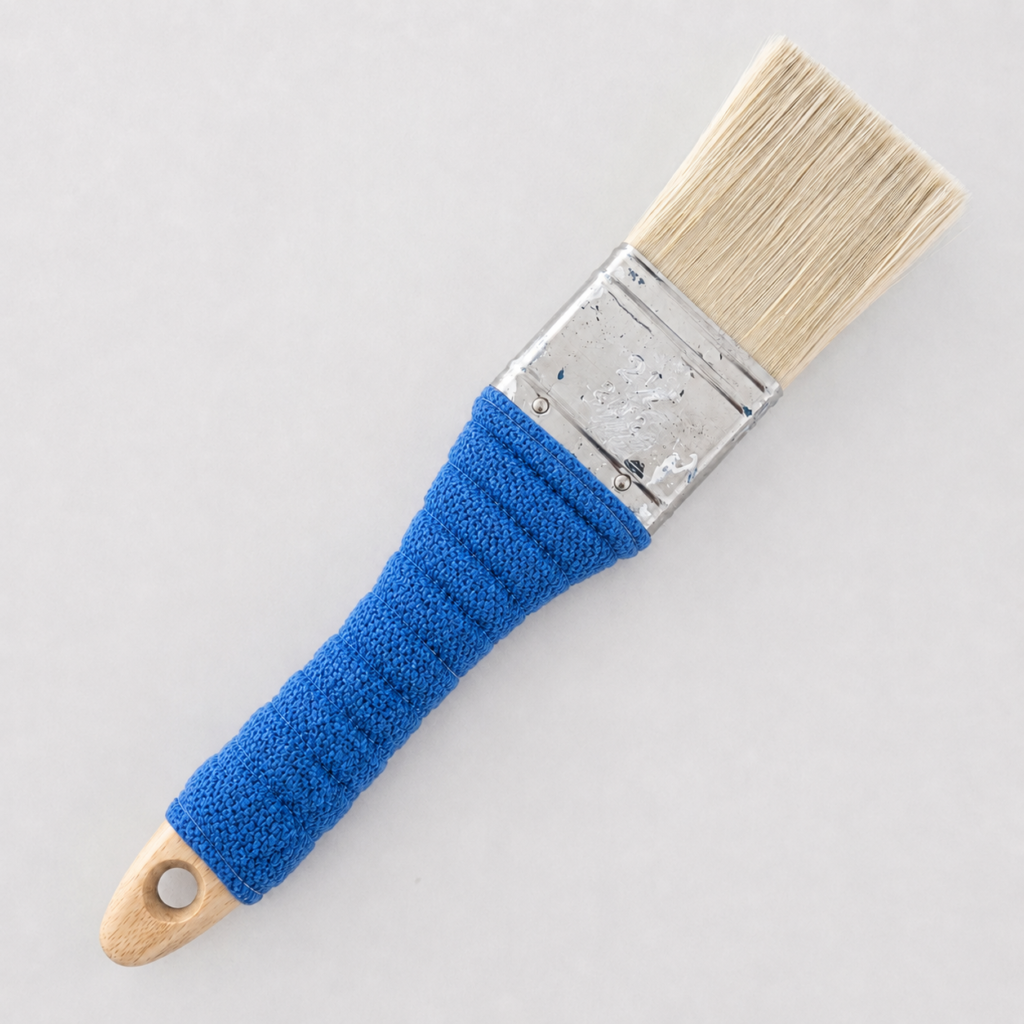
5. Make Your Paintbrush More Comfortable to Hold
After holding a paintbrush for several hours, my hand can become tired, cramped, and sometimes even numb.
One of my favorite brushes for trim and detailed painting is the Wooster Shortcut Angle Brush. The short, flexible handle is much more comfortable for me to hold, and the angled nylon bristles help create a smooth, clean line.
You can also wrap self-adhesive bandage wrap around the handle of your favorite paintbrush or roller.
The wrap adds cushioning and makes the handle slightly larger and easier to grip. This simple trick can make a big difference during long painting projects.
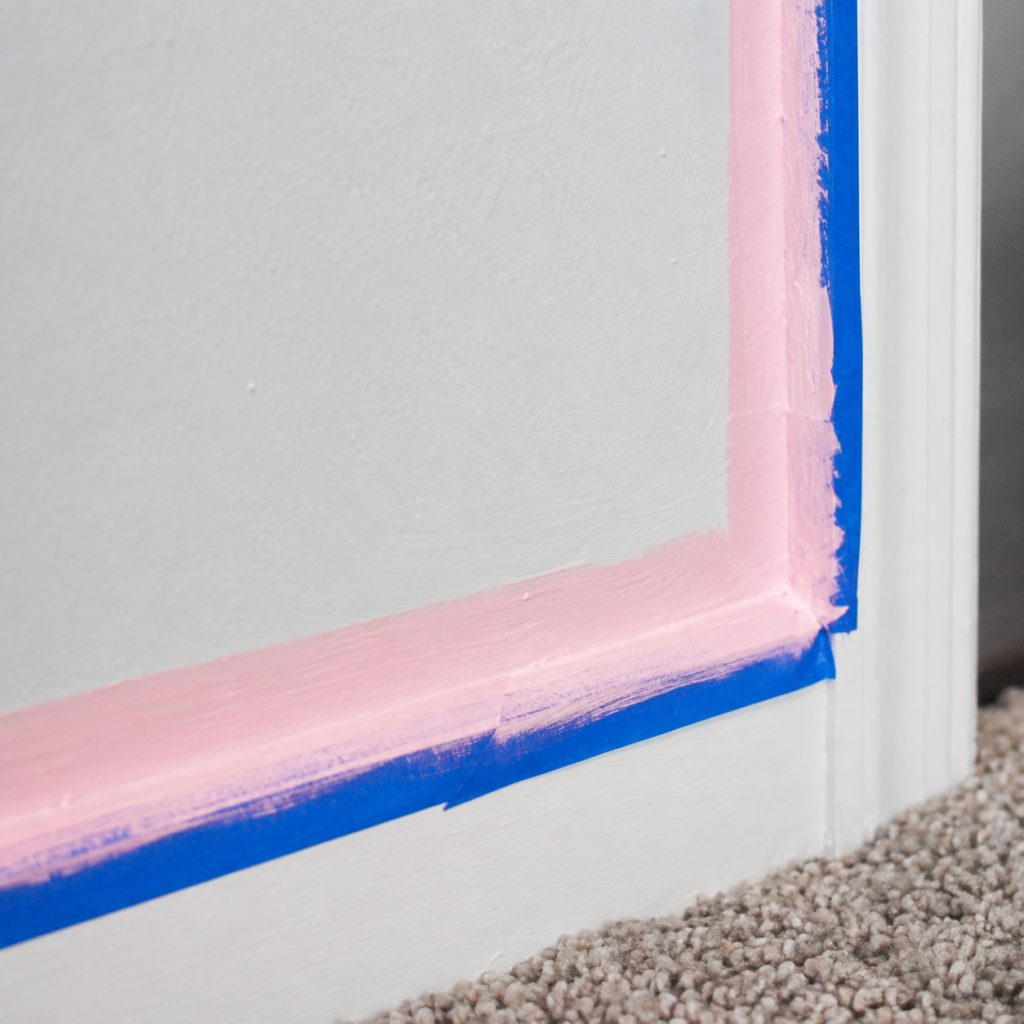
6. Seal the Edge of Painter’s Tape
Painter’s tape can help create a straight line between two paint colors, but simply applying the tape does not always prevent paint from bleeding underneath.
For an extra-clean line, seal the edge of the tape using the color that is already beside it.
For example, when painting a colorful wall next to a white ceiling, apply the tape and then paint over the edge with the white ceiling paint. When painting a dark accent wall next to a neutral wall, seal the tape with the neutral wall color.
This fills any tiny gaps underneath the tape. After that layer dries, paint over it with your new color. The new paint should not be able to seep under the sealed edge.
7. Remove Painter’s Tape Before the Paint Dries
Have you ever removed painter’s tape and accidentally pulled pieces of your fresh paint off with it?
To help prevent this, remove the tape while the final coat of paint is still wet.
Once paint fully dries, it may form a seal across the edge of the tape. Pulling the tape away can then tear or peel the paint.
Removing wet tape can be slightly messy, so pull it slowly and carefully. Keep a trash bag nearby and avoid letting the painted side of the tape touch your walls, floor, or clothing.
8. Keep a Damp Paper Towel Nearby
No matter how careful you are, paint sometimes ends up where it does not belong.
I always keep a damp paper towel or cloth nearby while I am painting. Fresh paint can usually be wiped away easily from trim, flooring, adjoining walls, and many other surfaces when you catch it right away.
Cleaning a small drip immediately is much easier than trying to scrape or sand away dried paint later.
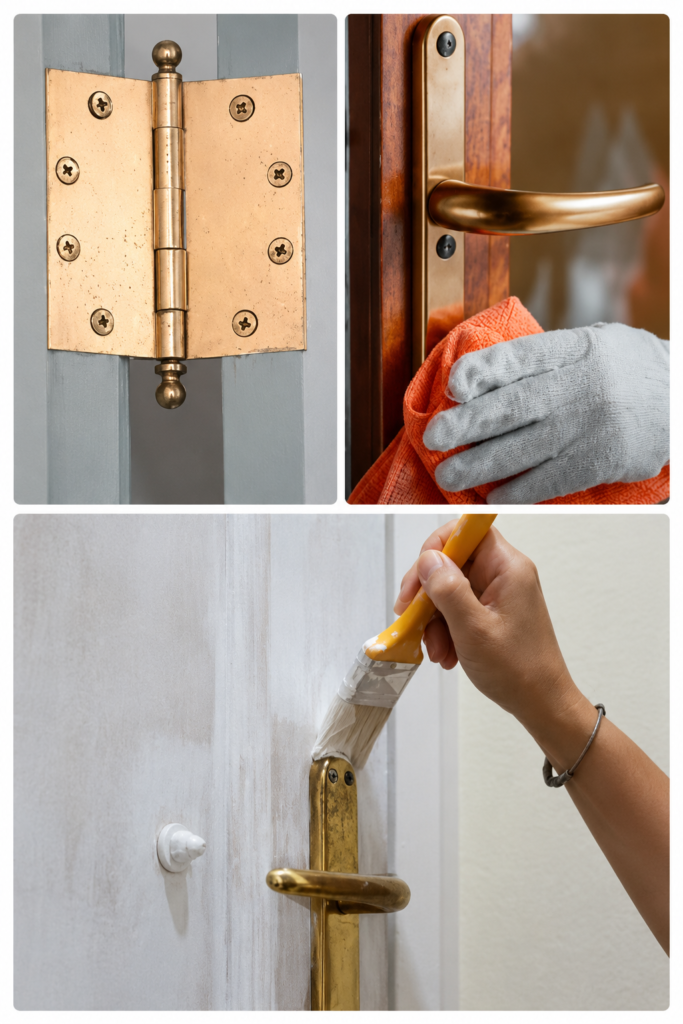
9. Use Petroleum Jelly to Protect Small Areas
Petroleum jelly can help protect hinges, screws, knobs, and other small pieces of hardware that cannot easily be removed.
Before painting, apply a light layer of petroleum jelly to the surface you want to protect. Paint will not adhere properly to the greasy coating.
Once the surrounding paint has dried, wipe away the petroleum jelly and any paint sitting on top of it.
Use a small amount and apply it carefully so it does not spread onto areas you actually want to paint. Using a q-tip or small cheap paintbrush or sometimes just a finger works!!
10. Store Brushes and Rollers Between Coats
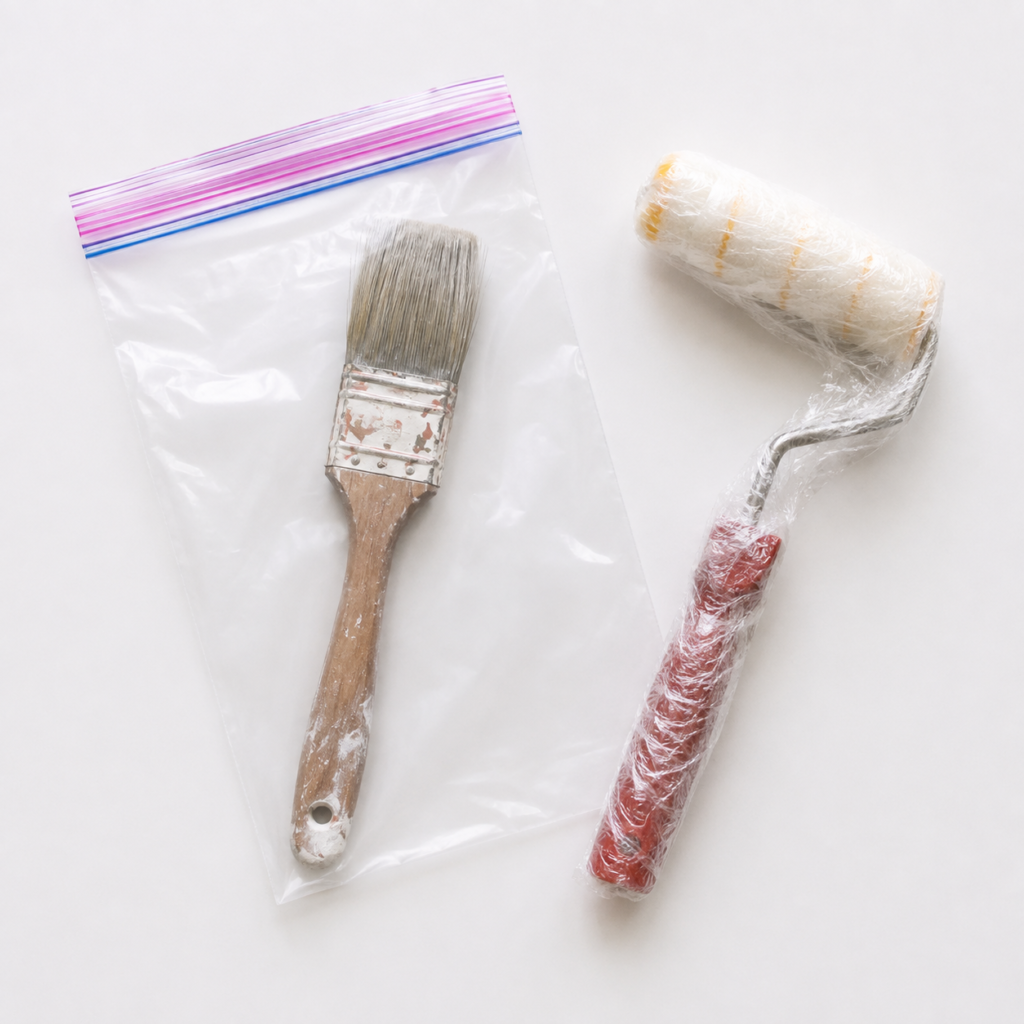
Most painting projects require more than one coat, but you do not need to completely wash your brushes and rollers every time you take a break.
Wrap them tightly in plastic wrap or place them inside a sealed plastic bag to keep the paint from drying.
For longer breaks, you can place the wrapped tools in the refrigerator. Just make sure they are sealed well and kept away from food.
I can usually use the same brush for several days this way without the paint drying inside the bristles. Allow the tools to return to room temperature before painting again.
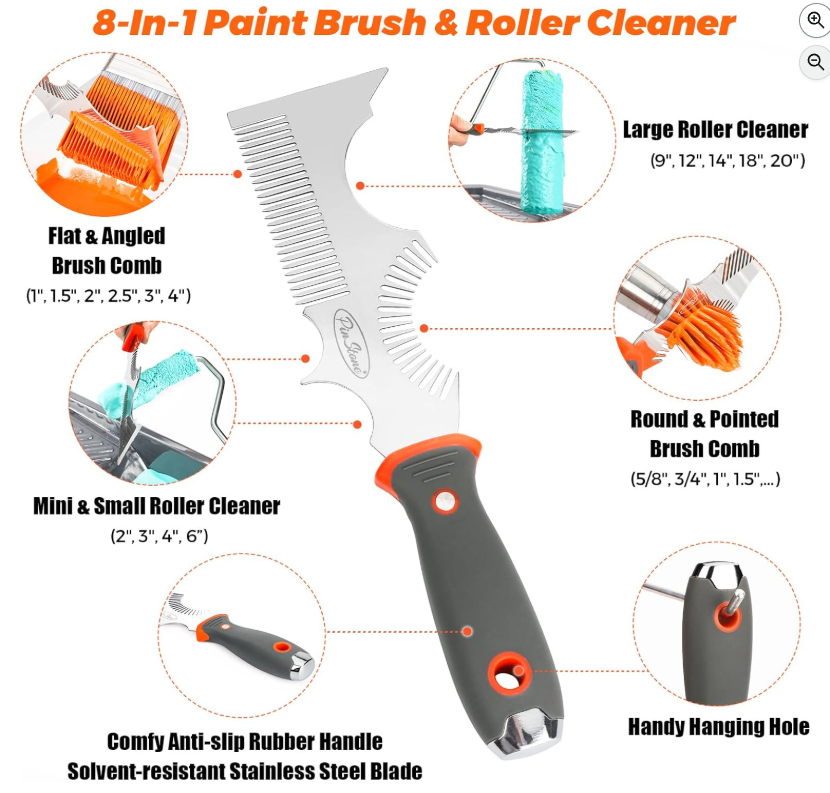
A paintbrush cleaning comb is a simple and inexpensive tool that can help keep your good brushes soft and smooth.
After washing the brush, run the comb through the bristles to remove trapped or dried paint. I do not use one after every single project, but I reach for it whenever my brushes start to feel stiff.
Many brush-cleaning tools also include a curved edge that can be used to scrape excess paint from a roller before washing it. You can grab my favorite 8-in-1 Paint Brush Comb and Paint Roller Cleaner Tool
And I will admit it—before I bought a cleaning comb, I used a kitchen fork! The proper tool works much better and is definitely kinder to the paintbrush.
12. Label Leftover Paint by Room
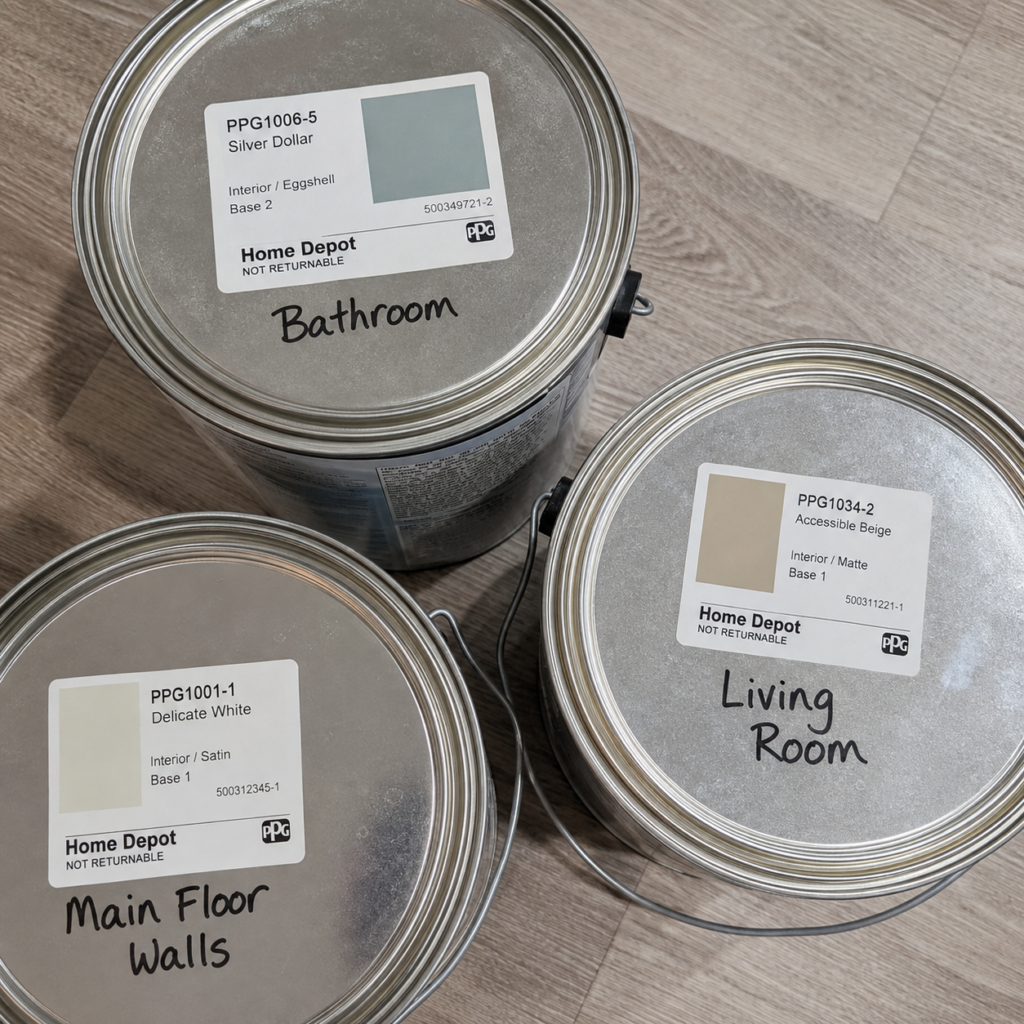
When you have paint left after finishing a project, write the name of the room or item directly on the can.
Labels such as Main Floor Walls, Living Room, Kitchen Cabinets, or Bathroom make future touch-ups much easier.
Also make sure the original store label, paint brand, finish, color name, and color code remain clean and readable.
I also like to take a clear picture of the label and save it in the Notes section of my phone. That way, even if the can is lost or the label becomes damaged, I still have the information needed to purchase more.
13. Fix Paint Drips After They Dry
Even when you apply several light coats of paint, a drip can still happen.
When you notice one, resist the urge to touch it while it is wet. Trying to wipe or smooth wet spray paint usually creates a much bigger smudge.
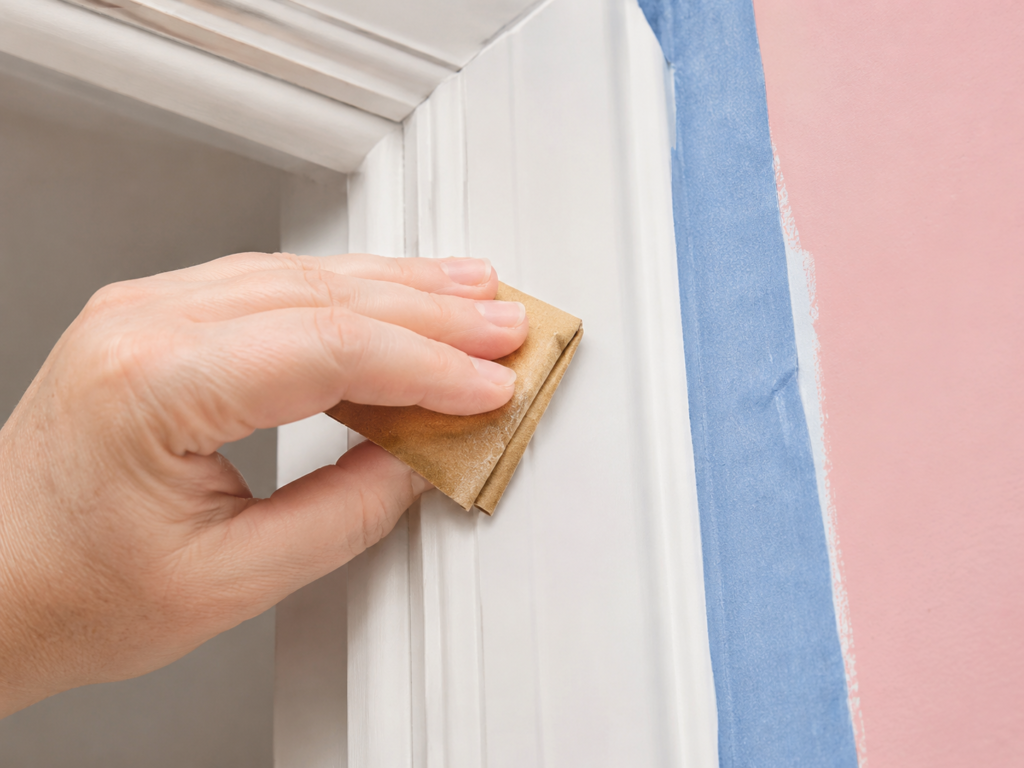
Allow the paint to dry completely. Then lightly sand the raised drip using fine 220-grit sandpaper. Wipe away the sanding dust and apply another light coat of paint.
For a very small area, you can carefully touch it up with a small artist’s brush.
Make Your Next Painting Project a Little Easier
Painting can completely change the look of a room, a piece of furniture, or even an entire home—but it can also become tiring and messy very quickly.
These simple tricks have saved me time, helped protect my painting tools, reduced cleanup, and made many of my projects much easier.
I hope you discovered at least one new painting hack that you can use during your next project!
Be sure to use the arrows below to explore more of my home-improvement ideas, decorating inspiration, affordable finds, and practical tips from Oh Lala Great Deals and Finds.
Here are some of my other helpful posts on painting:
How to Paint a Room Like a Pro: A Complete Step-by-Step Guide
Visit My Pinterest Page for color inspirations too!!

Pingback: The Power of Primer: Steps That Makes Painting So Much Easier -
Pingback: How to Paint a Room Like a Pro -